Site Tags
Introduction
Site Tags let you organize your sites within the workspace using color-coded labels. Whether you’re managing a handful of projects or sites, tags help you quickly organize and filter your sites right from the dashboard.
This guide will show you how to add Site Tags, manage them within the workspace, and view or filter sites using them.
To add a site tag or access existing tags, you can take the following steps:
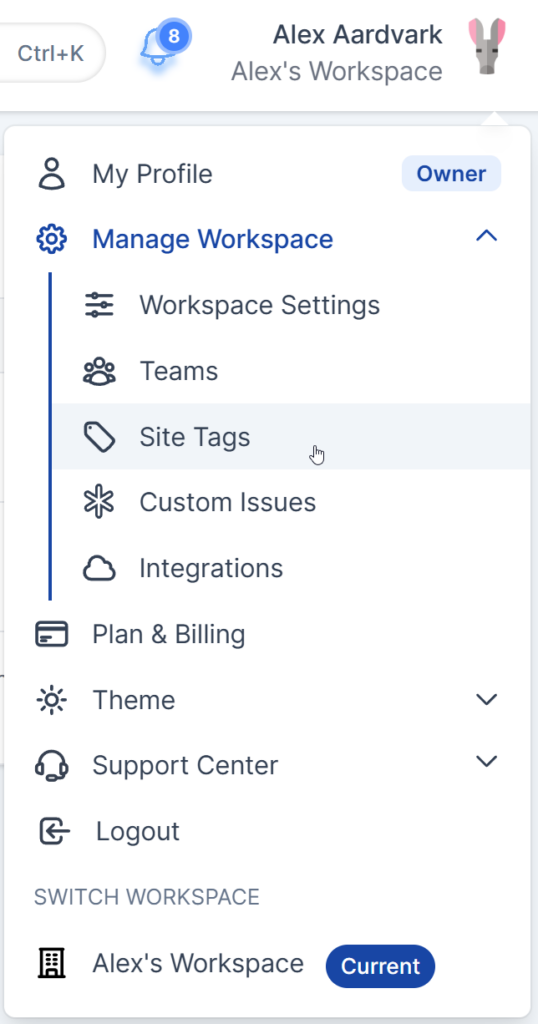
- Hover over your profile icon in the top-right corner and click to open the menu.
- Open the Manage Workspace dropdown, then select Site Tags from the options.
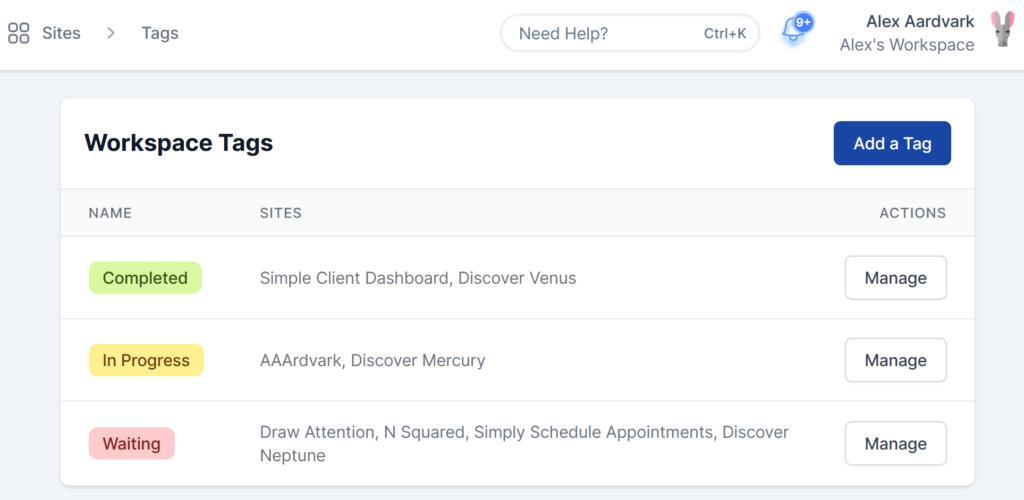
The Site Tags page gives you an overview of all the tags in your workspace, including their names, colors, and the sites they’re assigned to. From here, you can either manage added tags or create new ones.
Adding a Site tag
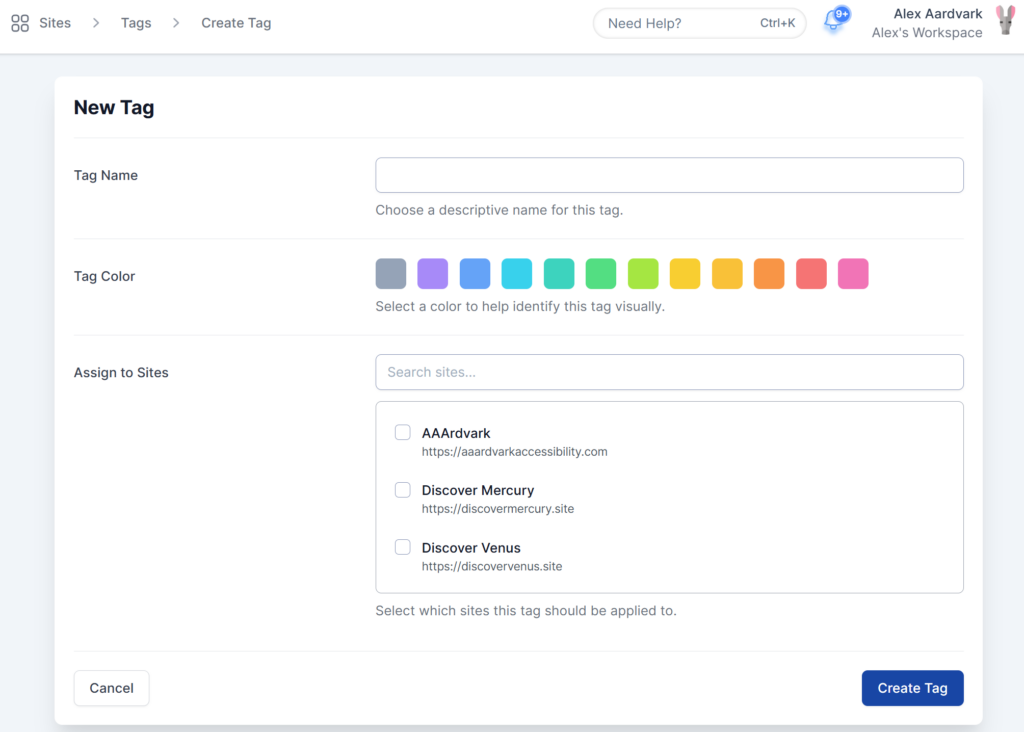
From the Site Tags page, click Add a Tag. You’ll see a form with the following fields:
- Tag Name: Give your tag a name (e.g., “Client A,” “Staging,” “Redesign”)
- Tag Color: Pick a color so it’s easy to spot on your dashboard
- Assign to Sites: Choose which sites to assign the tag to
Once everything looks good, click Create Tag. The new tag will show up in your Site Tags list.
The Manage option also lets you update the same details you added when creating or previously editing the site tag, such as Name, Tag Color, and Assigned Sites.
Additionally, if a tag is no longer needed, you can remove it from the Site Tags page via the Delete option. Removing a tag just unlinks it from the sites – it won’t delete the sites themselves.
Click Manage next to any tag to update its details.

After you’ve tagged your sites, the tags will appear on the Site Card. In addition, Site Tags are displayed on the Site dashboards as well under Site Name.
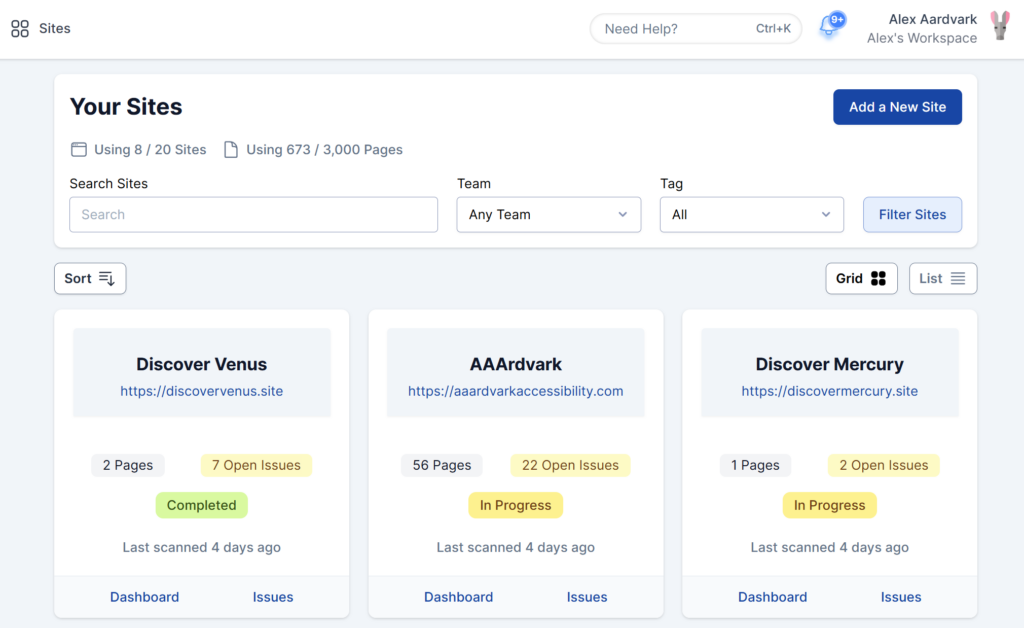
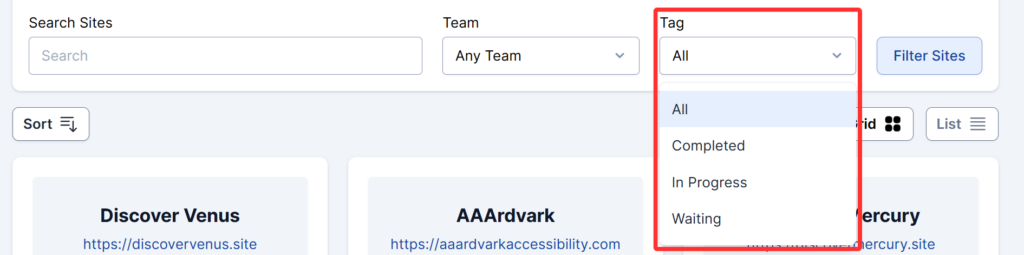
You can then filter your sites by tag. Use the Tags filter at the top of the Workspace Dashboard to select one or more tags and narrow down the list to just the sites you’re looking for.