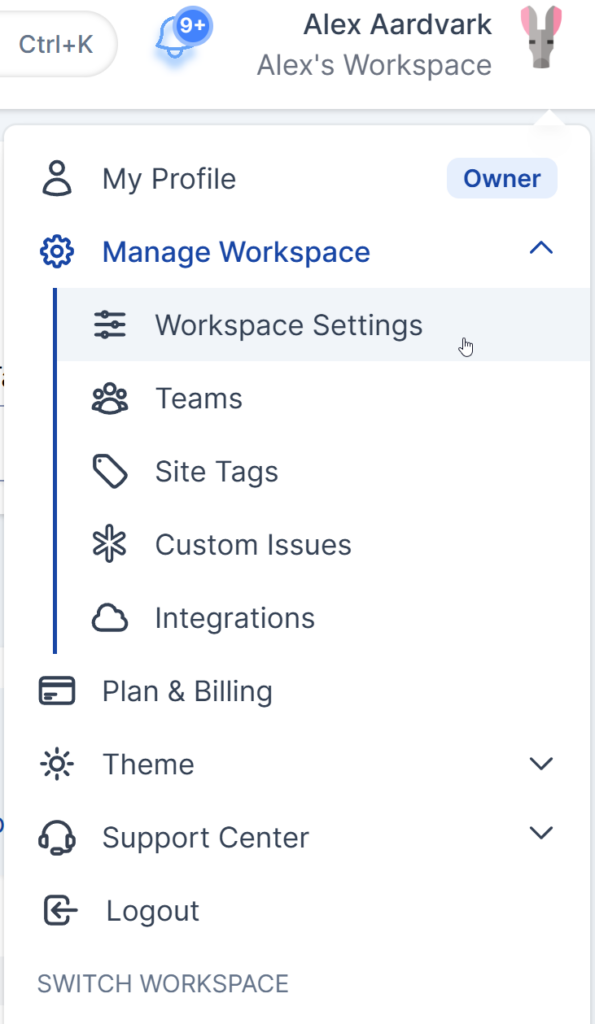
Manage Workspace
Introduction
In AAArdvark, a Workspace represents your account.
To make changes to your Workspace Settings information, click your name in the top-right corner of the AAArdvark interface > click Manage Workspace > and click Workspace Settings.
If an invited user wants to set up and manage their own Workspace, they’ll need to register a new account.
Workspace Settings
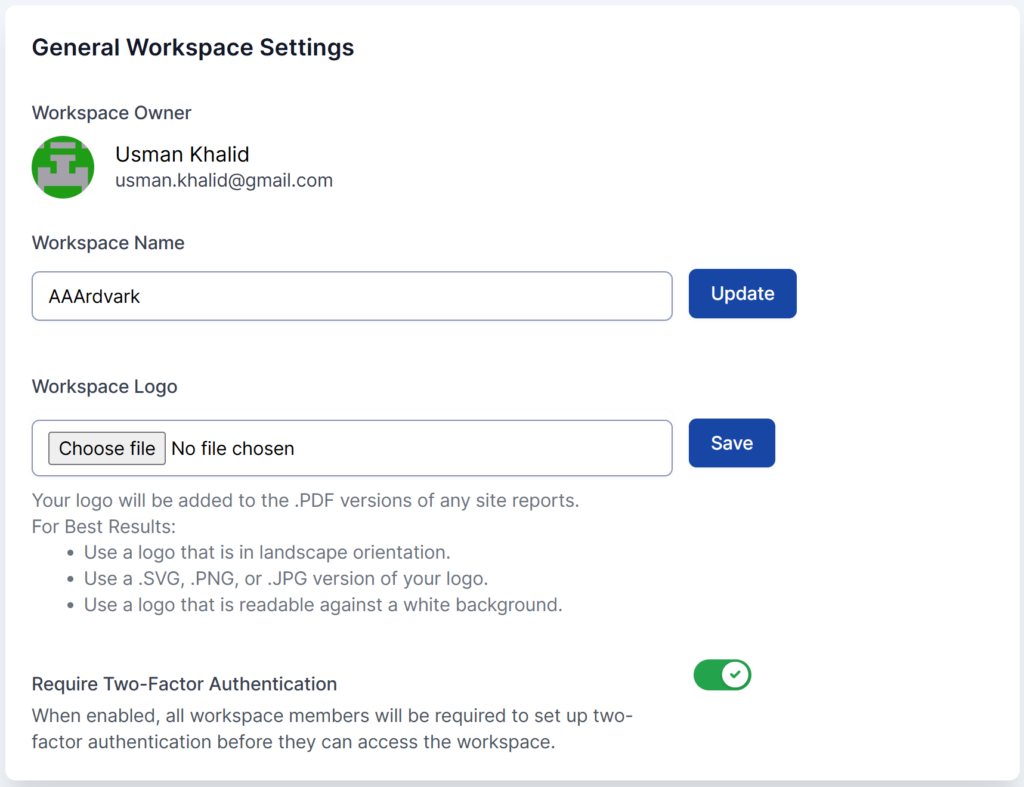
In Workspace Settings, you can manage general account and authentication details for the Workspace, such as:
- Workspace Name: This appears on all the pages of the AAArdvark app and in PDF site reports. Use your agency or business name for consistency.
- Workspace Logo: Appears in generated PDF reports. We recommend uploading a professional logo.
- Two-Factor Authentication: Enable this setting to require all workspace members to use two-factor authentication when signing in, helping keep your workspace secure.
You’ll also see the Workspace Owner information here. This user has permission to manage users, sites, plans, billing information, and cancel the account.
The Workspace Owner is a special role assigned to the person who created the account.
Can You Transfer Sites or Data Between Workspaces?
At this time, it’s not possible since data transfer between workspaces isn’t supported. We recommend exporting reports before transitioning to a new workspace. That way the old data is on hand.