

Automated Scans
Introduction
AAArdvark provides automated scans to help quickly identify straightforward accessibility issues on your site.
The automated accessibility scans are a great way to speed up the auditing process because you won’t have to scan for these smaller instances and AAArdvark can also detect when these issues are resolved.
Accessibility Scan Notice
Note: Like all automated scanners, AAArdvark’s accessibility scanner is not comprehensive and may not identify every issue on your site. The Automated Scans are only a great starting point for an audit, where a professional can then come in and perform a full and thorough manual audit to find the rest of the issues.
Unpaid Invoice Notice
Note: If your workspace has an unpaid invoice, scans are paused until it’s resolved. This applies to manual scans, scheduled scans, and the browser extension and MCP APIs alike. See Unpaid Invoice and Scan Pausing for what to expect and how to clear it.
Automated Scans
Automated scans can be scheduled to run regularly or triggered manually with a single click.
Any new errors or warnings found in the scans will be added to the Issues list.
Equivalent URLs Count as One Page
AAArdvark treats different URLs that point to the same page as a single page across scanning, sitemaps, the dashboard, and the browser extension. This covers a page with or without a trailing slash, served as a directory index document like /index.html or /default.aspx, and URLs that only differ by tracking parameters. You shouldn’t see duplicate page entries going forward, and any duplicate records left over from before this change have already been cleaned up.
Sitemap Re-detection
If your site didn’t have a sitemap when you added it to AAArdvark, opening the Site Dashboard now re-checks for one. If you publish a sitemap after adding the site, AAArdvark picks it up the next time you visit the dashboard. You don’t need to remove and re-add the site.
Scheduled Automated Scans
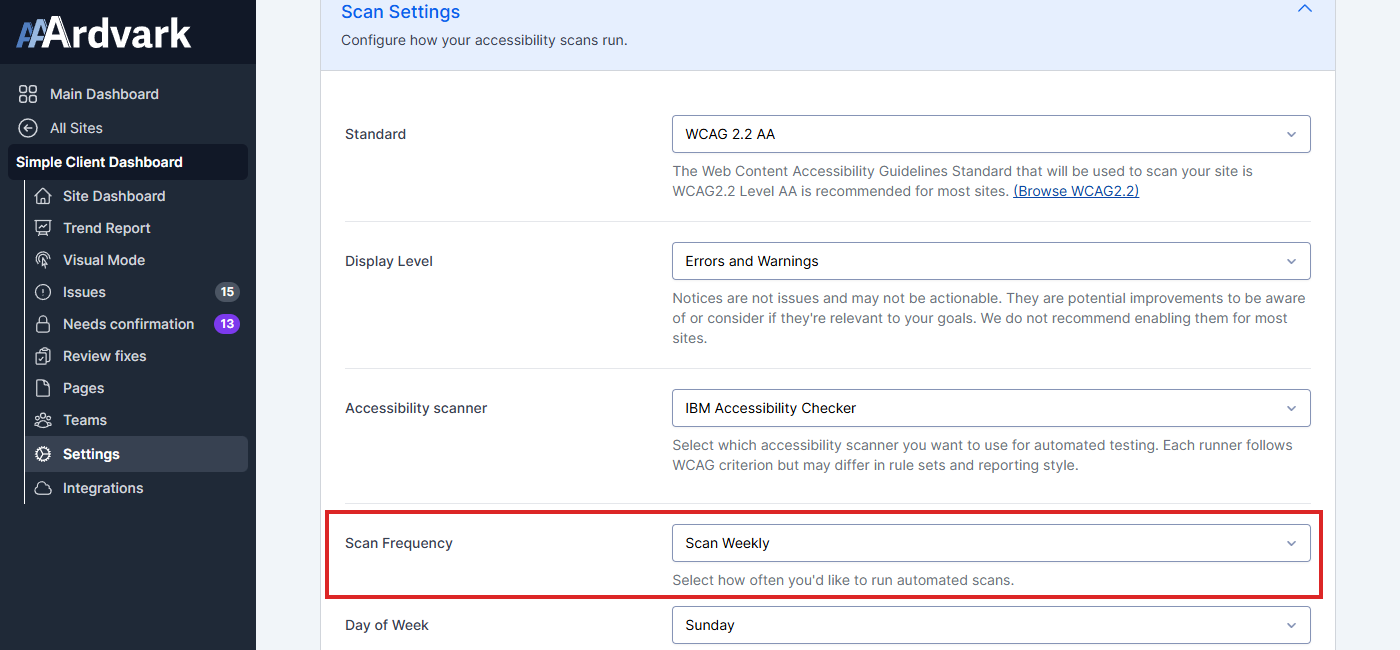
During the initial site configuration, you selected a ‘Scan Frequency’ option: Manual Only, Weekly, or Daily.
If you need to change this, you can always head to the Site Dashboard > Settings tab and change the Scan Frequency option from there.
Free workspaces: Scheduled scans stop automatically after three months with no sign-ins, API activity, or manual scans. The workspace owner and any Administrator get an email and an in-app notification when this happens, and the weekly and monthly summary emails pause too. Any activity, such as signing back in, an API call, or a manual scan, resumes scheduled scans on your existing schedule. Paid workspaces are not affected.
Manual Automated Scans
You can run one manual automated scan at a time. There are several ways to run manual automated scans for your site.
Whole Site Manual Automated Scans
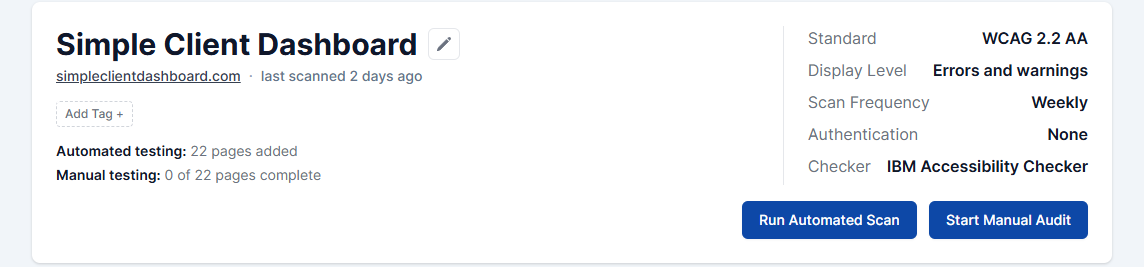
To run a manual scan for a site, navigate to the Site Dashboard, then click Run Automated Scan. This action will initiate a new scan, and the Activity Log will update with the scan’s progress.
If a sitemap is still being imported when you click Run Automated Scan, AAArdvark now explains that the scan can’t start yet instead of appearing to do nothing. Wait for the sitemap import to finish, then try again.
Single Page Manual Automated Scans
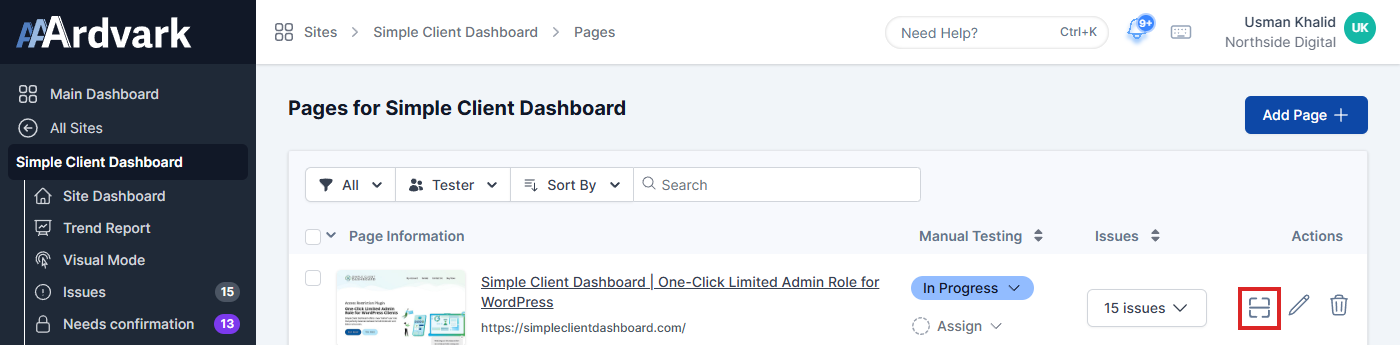
To run a single-page manual scan, navigate to the Pages section and click on the Scan Icon in front of the individual pages to initiate a new scan.
Subset of Pages Manual Automated Scans
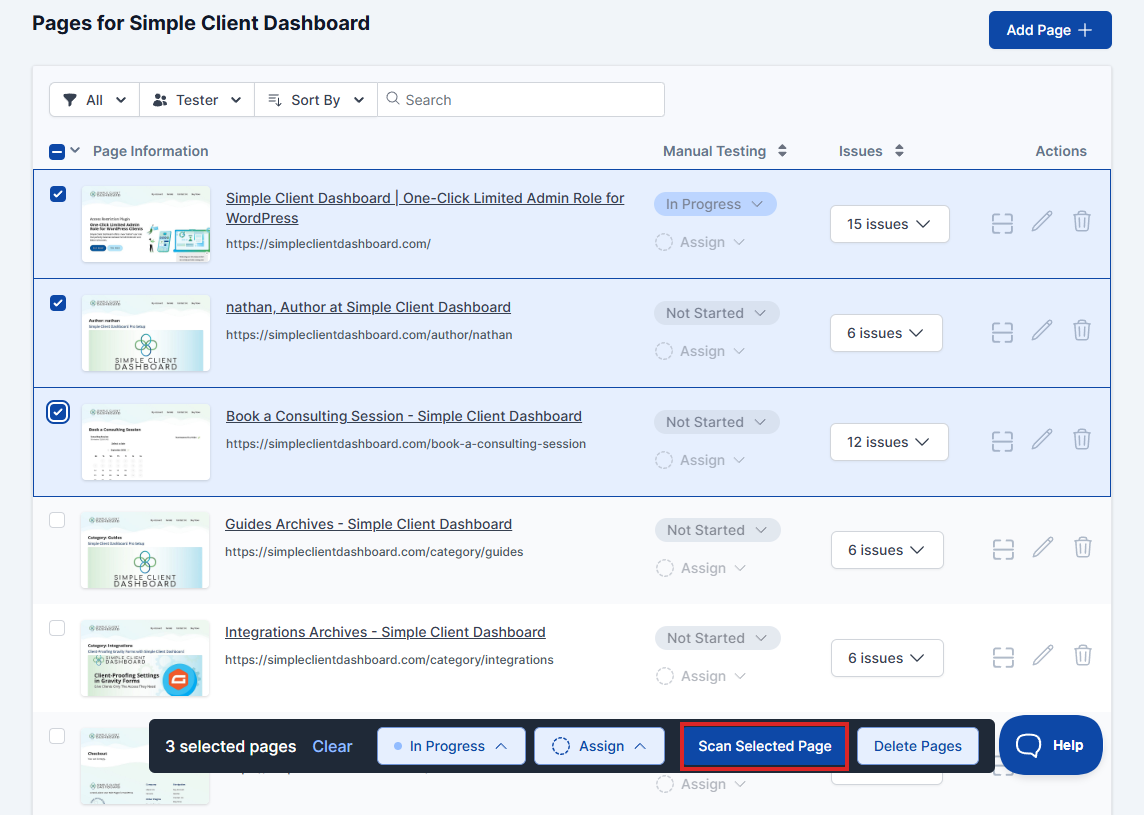
To run a manual scan for a subset of pages, navigate to the Pages section and select the pages from the list view via the checkbox option. A bar appears at the bottom of the screen. Click Scan Selected Page to initiate the scan.
You can also scan just the pages that currently have errors. This action now only closes stale instances on the pages it actually scanned, rather than across the whole site, so pages outside that scan’s scope keep their existing issue status until they’re scanned directly.
Scan Progress Activity
Once the scan is in progress, you will see the total number of pages being scanned and the completion percentage.

If your site is protected by a managed web application firewall (WAF), multi-page scans are now paced to avoid tripping the WAF’s rate limit partway through. Scan stuck at the same percentage for a while? This pacing is often why, so give it a few extra minutes before reaching out to support.
Canceling a Running Scan
You can stop a scan that’s already running instead of waiting for it to finish. On the Site Dashboard, the Cancel scan option appears in these places:
- The header: While a whole-site scan is running, the Cancel scan button replaces the Scan is running… button.
- The scan’s activity card: Every in-progress scan has a Cancel scan button on its card in the Activity Log. Use this to cancel a single-page scan, a scan of selected pages, or a scan of just the pages with errors.
- The first-scan card: When you add a new site, you can cancel its first scan from the card that tracks it.
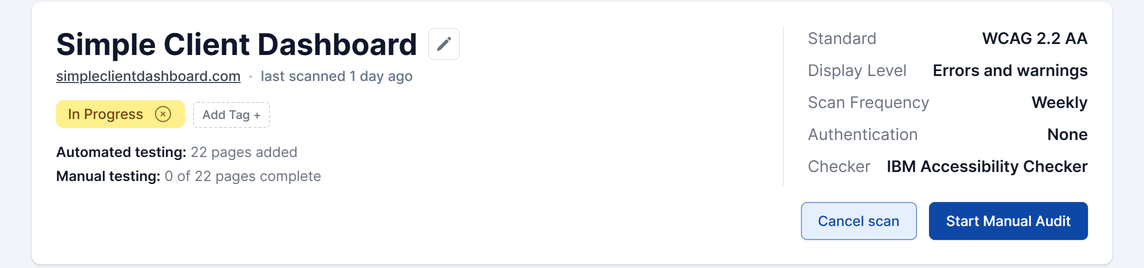
Clicking Cancel scan opens a confirmation dialog. Click Cancel scan to stop the scan, or Keep scanning to let it continue.
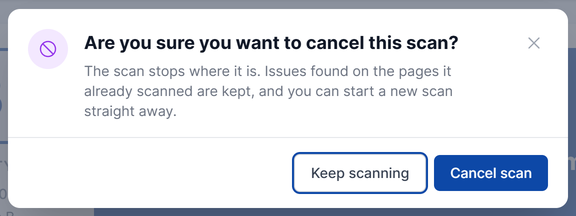
Once a scan is canceled:
- Issues found on the pages it already scanned are kept.
- The activity card shows who canceled the scan and how many pages were scanned before it stopped.
- A canceled scan isn’t treated as a failed scan, and no scan completed email or webhook is sent.

Canceling a scan doesn’t count against your scans, so you can fix your setup (for example, add any missing pages) and start a new scan right away. If a scan is already finishing up when you click Cancel, it can no longer be canceled and will complete as normal.
Anyone whose role can start scans can also cancel them. If a scan is canceled while you have Visual Mode open, Visual Mode shows a Scan canceled. notice instead of Scan is Complete.
Bypass Ad Elements
If your site contains third-party ads or ad-related elements that are interfering with scan results and you’d like to filter them out, you can contact our Support team.
We can help block or bypass these ad elements during scans for your site.
Results from Automated Scan
Scan results, whether from a scheduled or manual scan, are accessible in the Site Dashboard for review.
Site Statistics
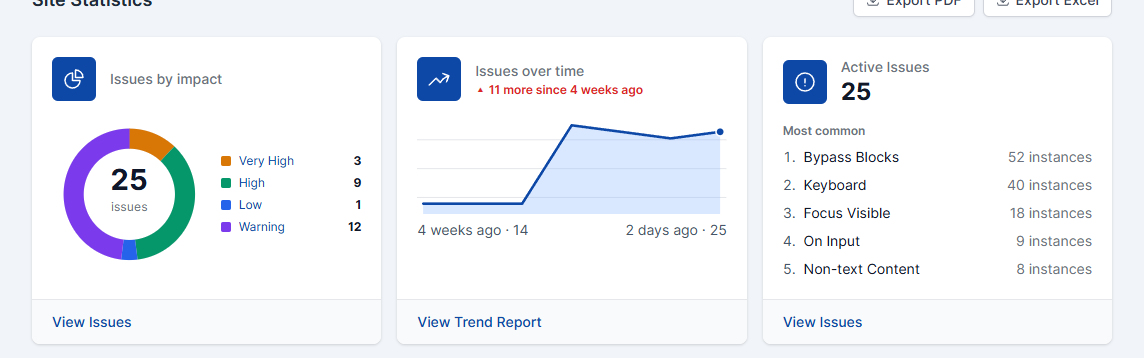
The Site Statistics section provides the following insights:
- Issues by impact: Visualize errors and warnings by severity level in an easy-to-read pie chart.
- Issues over time: Track how your total issue count has changed over the last few weeks, with a link through to the full Trend Report.
- Active Issues: View the total active issues, along with a summary of the most common issues.
You should see these module stats go down over time through the process of remediating instances on pages and running new scans.
Activity Log
All scan activities are recorded in the Activity Log on the Site Dashboard for easy tracking. From the listing, you can see an overview of:
- The number of pages scanned
- When the scan took place
- Who triggered the scan, if it was done manually
- Total number of errors and warnings found
The activity log filter defaults to All Activity, but you can use the dropdown menu to narrow it down instead.
