Profile Settings
Introduction
Your profile settings help you manage your account details, customize notifications, and monitor browser sessions. Keeping these settings up-to-date ensures you stay informed and in control of your AAArdvark experience.
If you need to manage your workspace, add users, and change roles, please view this guide.
Profile Information
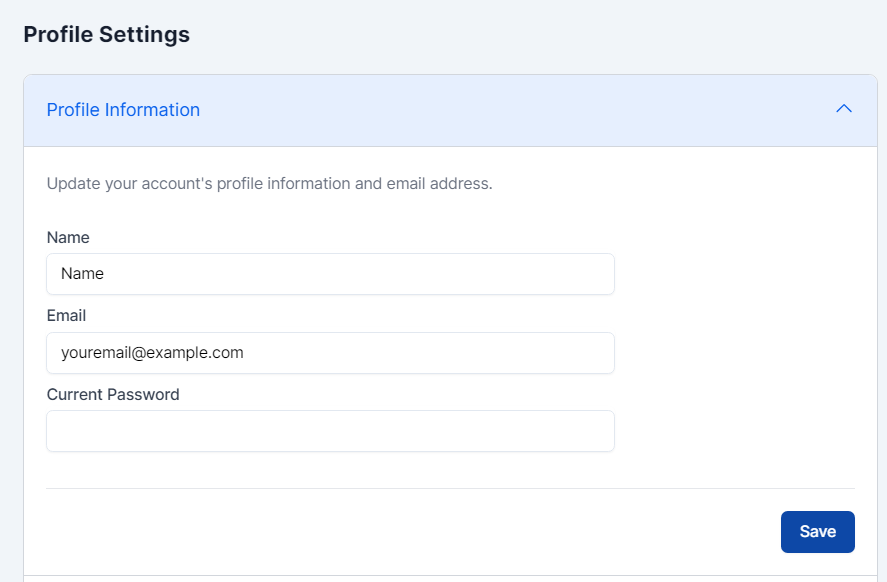
Use the Profile Information section to update your account details, including your email address. For security, you’ll need to enter your current password to save changes.
To update the profile settings, you must enter your current password as well.
Password
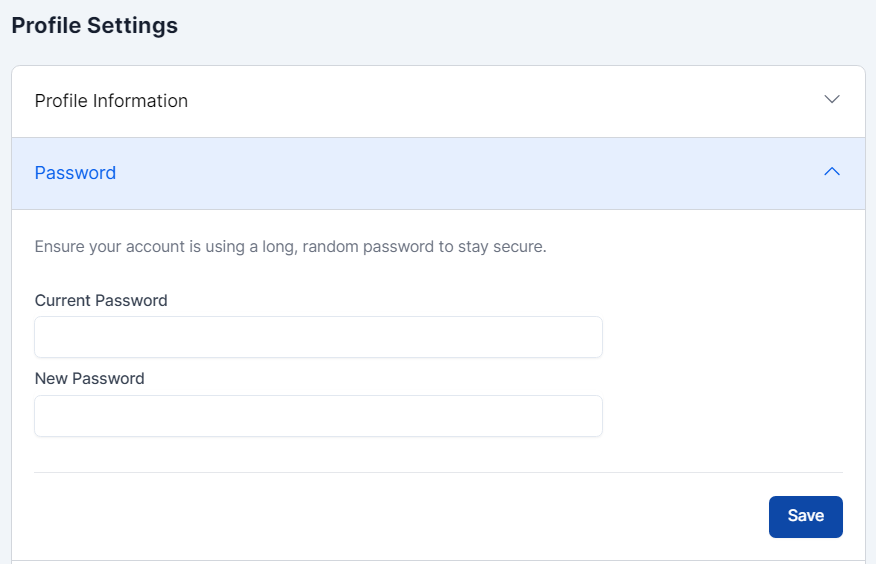
To update your password, go to the Password section in your profile settings. For enhanced security, choose a long, randomized password. Using a password manager can help you create and store strong passwords.
Notification Settings
In the Notification Settings section, choose how you’d like to receive updates—via site notification, email, or both. Site notifications appear under the bell icon in the top-right corner of your screen.
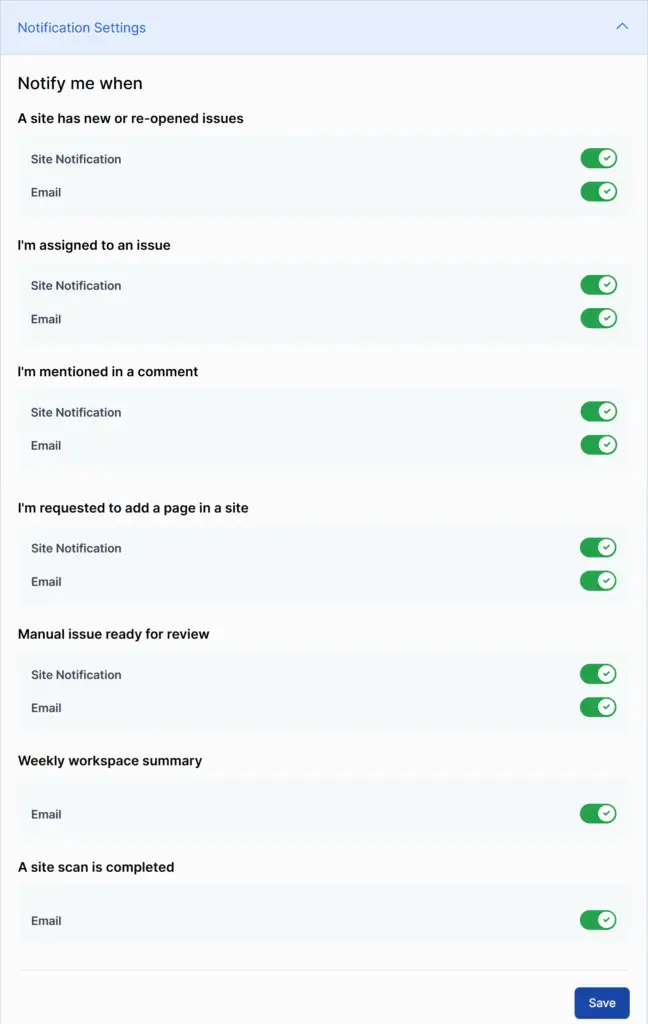
A Site has new or re-opened issues
Get notified when new issues are found during manual or automated scans, or when previously resolved issues are reopened.
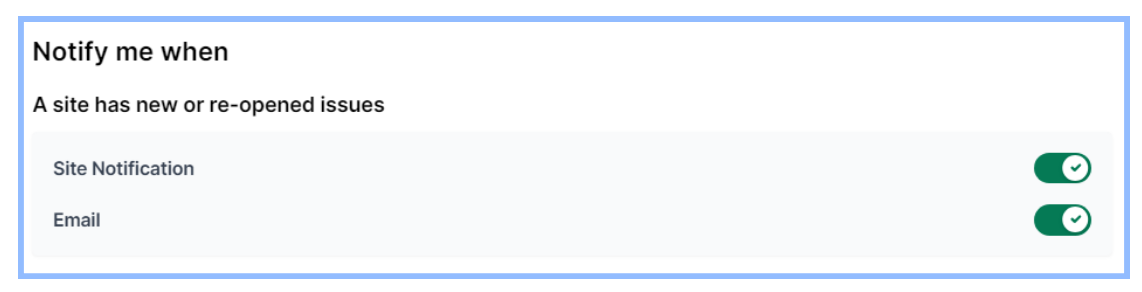
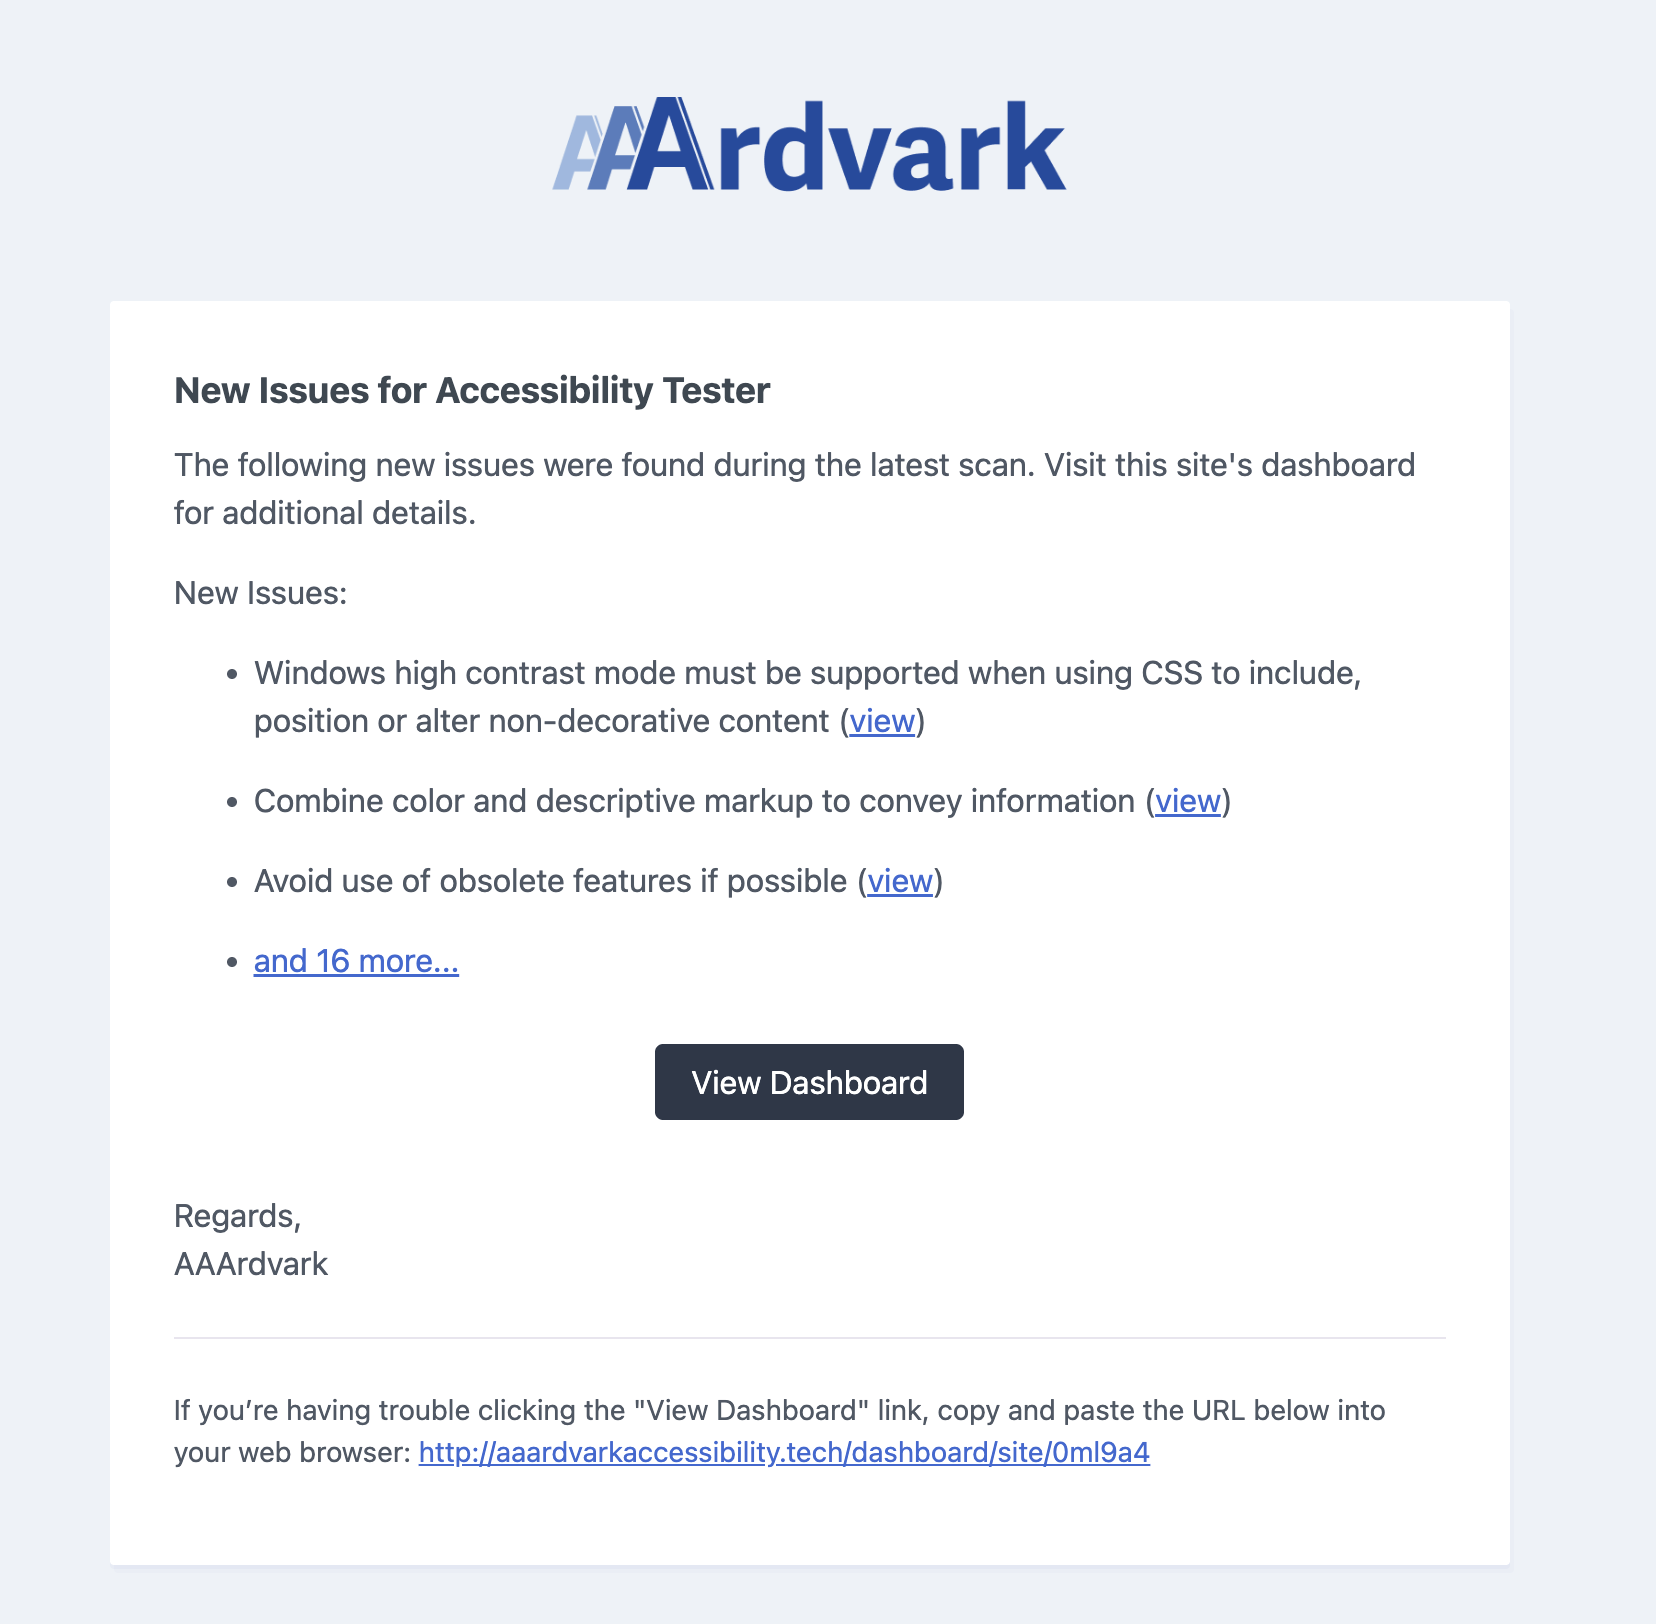
With this notification enabled, you will receive an email that will share a summary of new or reopened issues found during the scan.
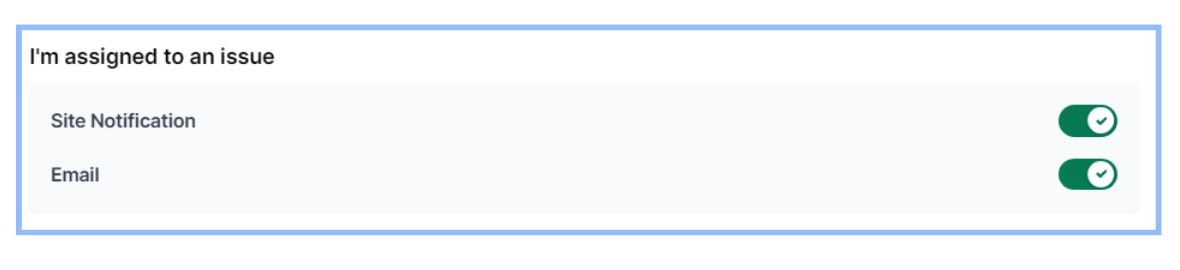
I’m assigned to an issue
Receive instant notifications when a team member assigns you an issue, ensuring you’re always up-to-date.
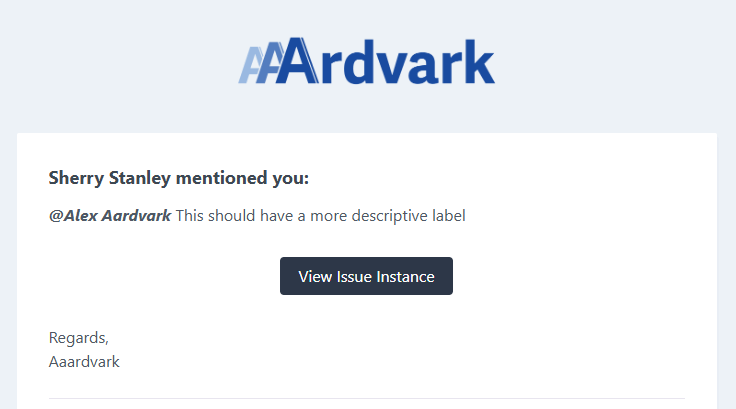
I’m mentioned in a comment
Stay informed with notifications whenever someone mentions you in an issue comment.
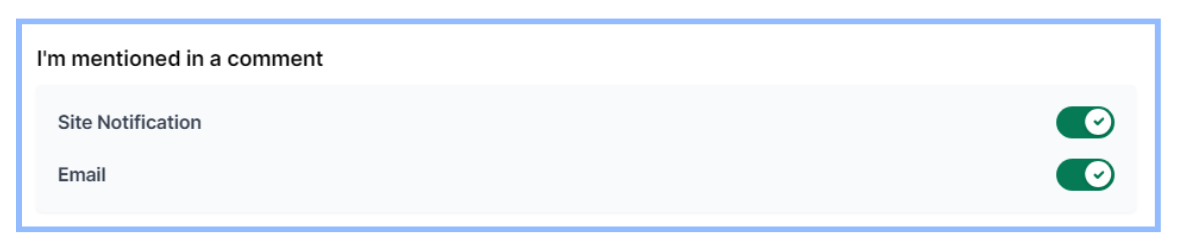
When you’re mentioned in an issue comment and have this setting enabled, you’ll receive an email displaying information about the issue.
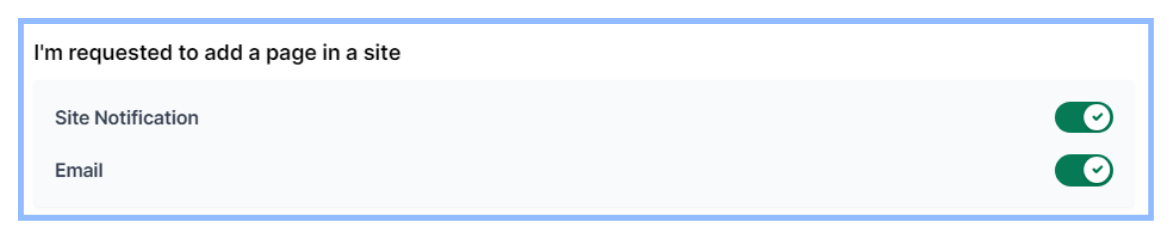
I’m requested to add a page in a site
Get notified when someone requests you to add a page to a site, so you never miss an update.
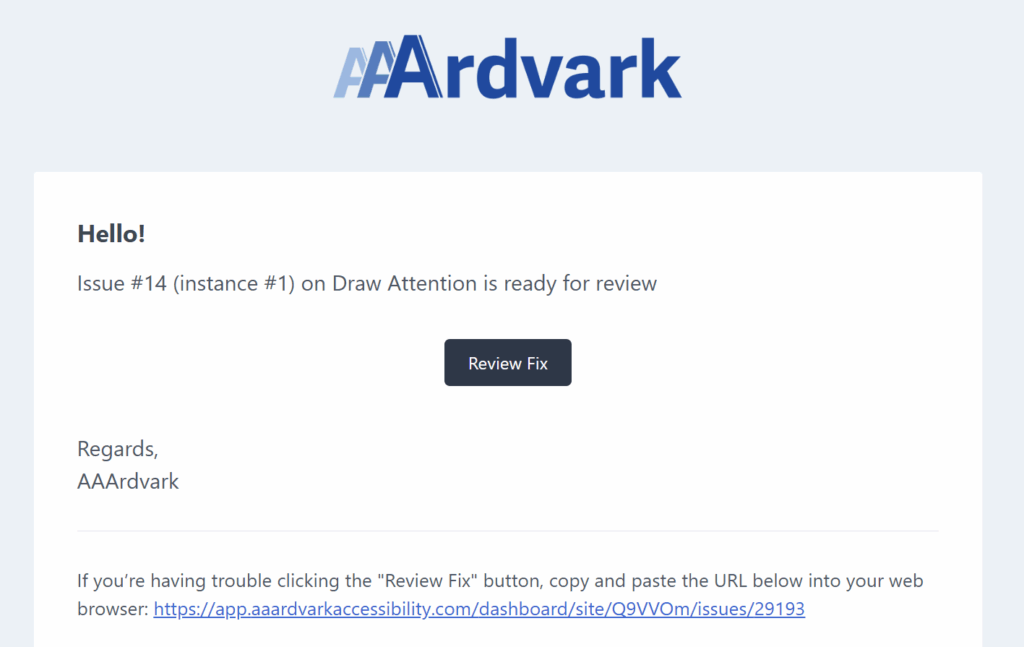
Manual Issue ready for review
Get notified when a manual accessibility issue requires your review. Never miss important tasks waiting for your approval.

When email notifications are enabled, you’ll receive an email each time a manual accessibility issue needs your review.
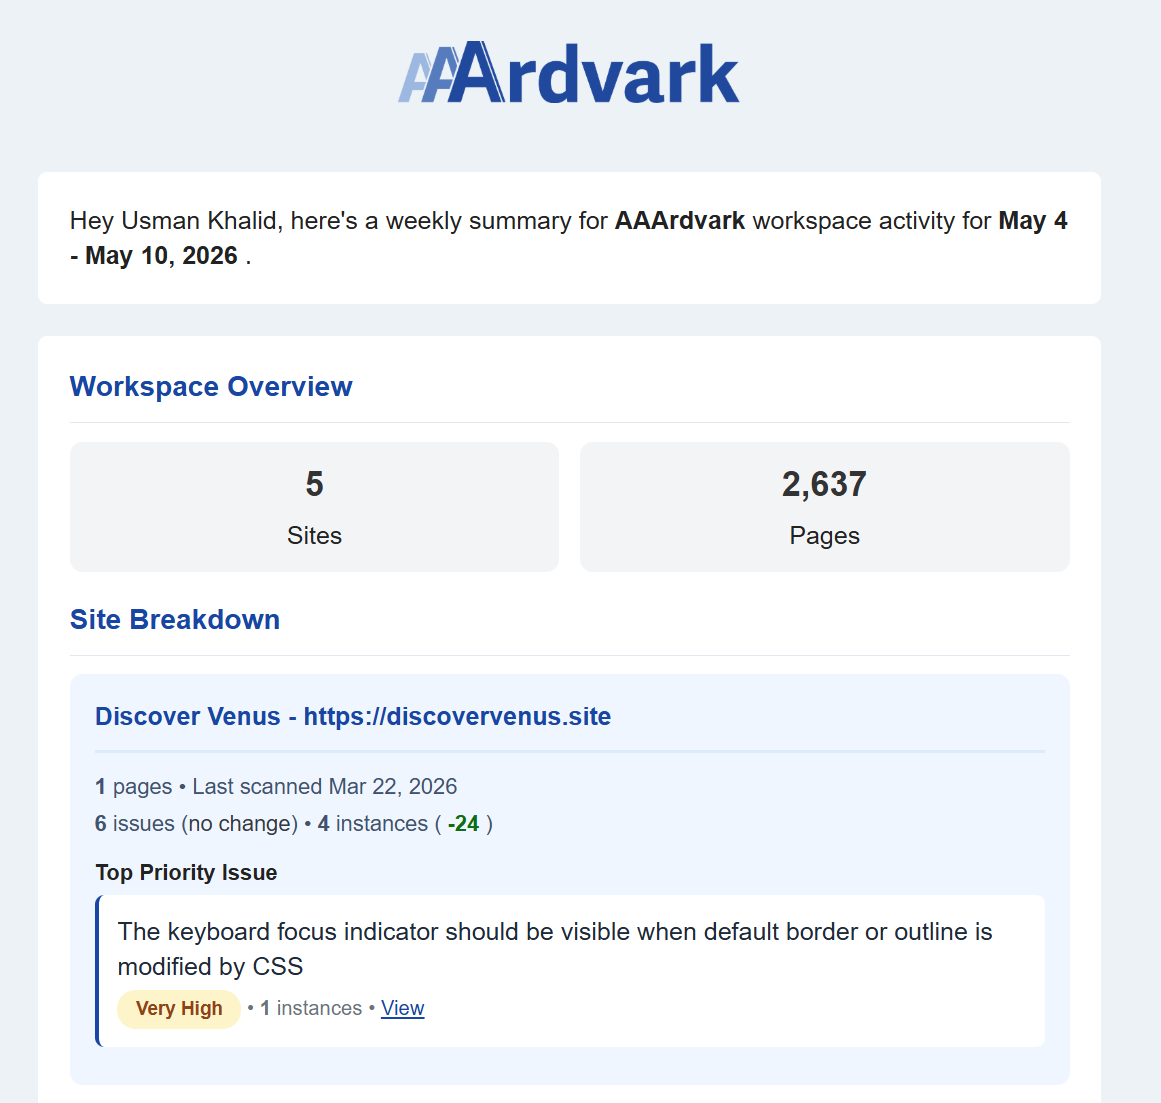
Weekly Workspace Summary
Receive a weekly email summarizing your workspace activity.

The email includes the following:
- Workspace Overview: The total number of sites and pages currently in your workspace.
- Site Breakdown: A summary of each site’s latest scan status, including:
- Last scanned date with page information
- Total issues and instances (with weekly change indicators)
- Top priority issue for each site, with severity level, occurrence, and a quick link to view in the Workspace.
- Quick Access: View Workspace Dashboard button to access your dashboard.
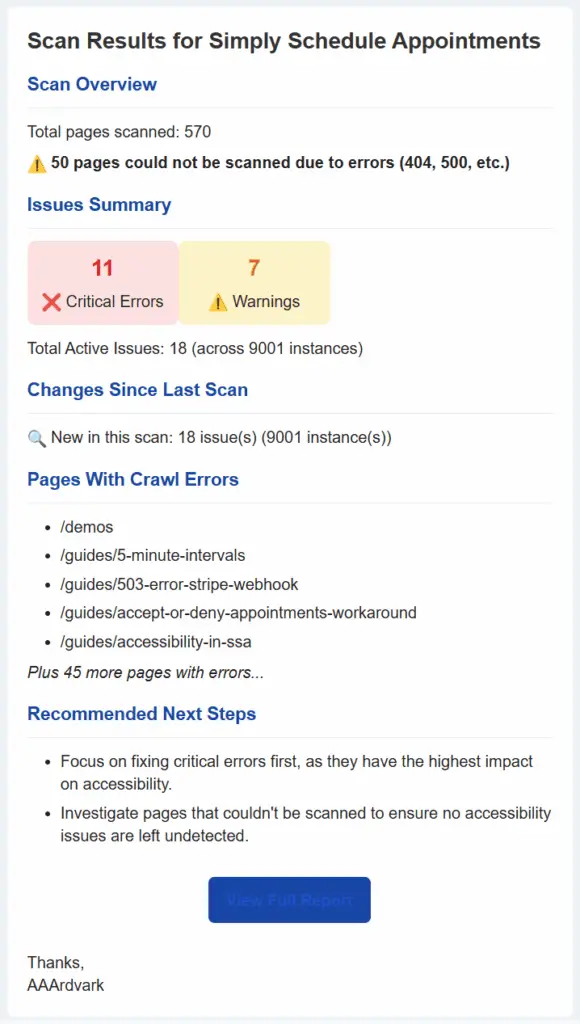
A Site Scan is Completed
Receive an email notification each time a site scan completes in your Workspace.

The email will contain scan results, including the following details:
- Total Pages Scanned: The number of pages successfully scanned during the process.
- Pages with Failed Scans: The number of pages that could not be scanned due to errors.
- Issue Summary: A snapshot of total active issues with a breakdown between critical errors and warnings.
- Changes Since Last Scan: Highlights any new issues detected compared to the previous scan.
- Pages with Crawl Errors: Identifies pages that search engines had trouble accessing.
- Recommended Next Steps: Actionable suggestions based on scan results to help address identified issues.
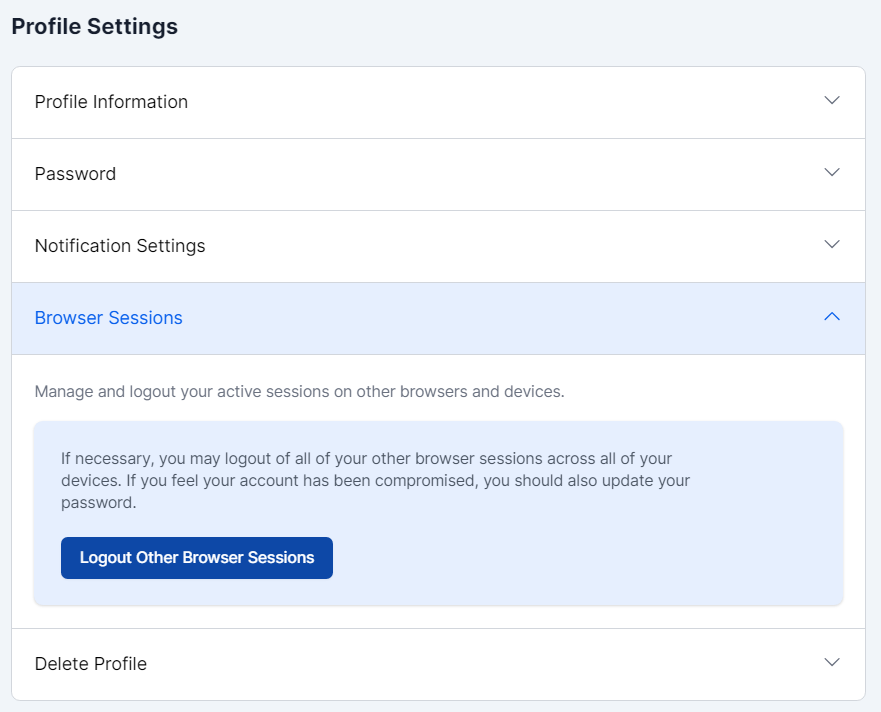
Browser Sessions
View all active sessions for your account across browsers and devices in the Browser Sessions section. If needed, you can log out of specific sessions to enhance security. This is also a great way to monitor and prevent suspicious login activity.
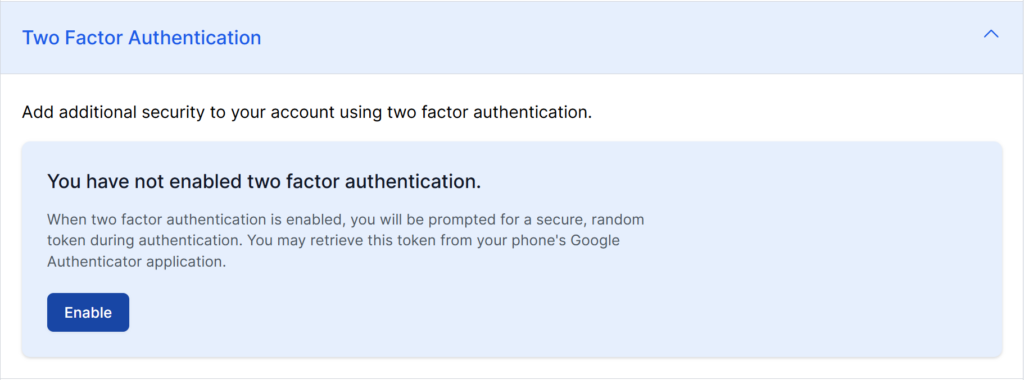
Two Factor Authentication
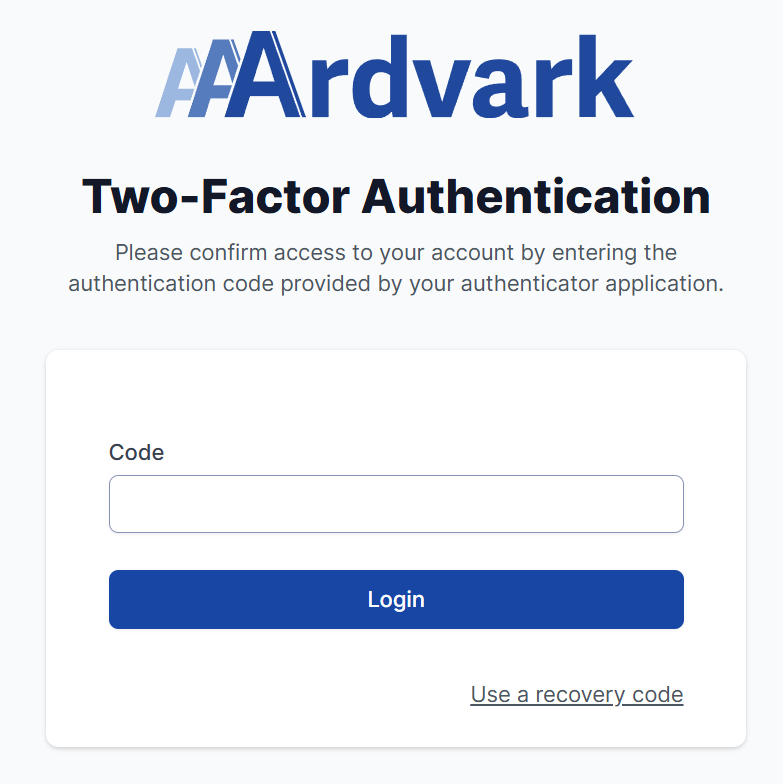
The Two-Factor Authentication option in your AAArdvark account lets you require a verification code each time you sign in. After entering your password, you’ll be prompted to enter a code generated by an authenticator app on your phone, such as Google Authenticator.
Below, we’ll walk you through the steps to activate the two-factor authentication for your AAArdvark account.
Enable Two-Factor Authentication
To start setting up two-factor authentication, go to the Two-Factor Authentication section in your profile settings and click the Enable button.
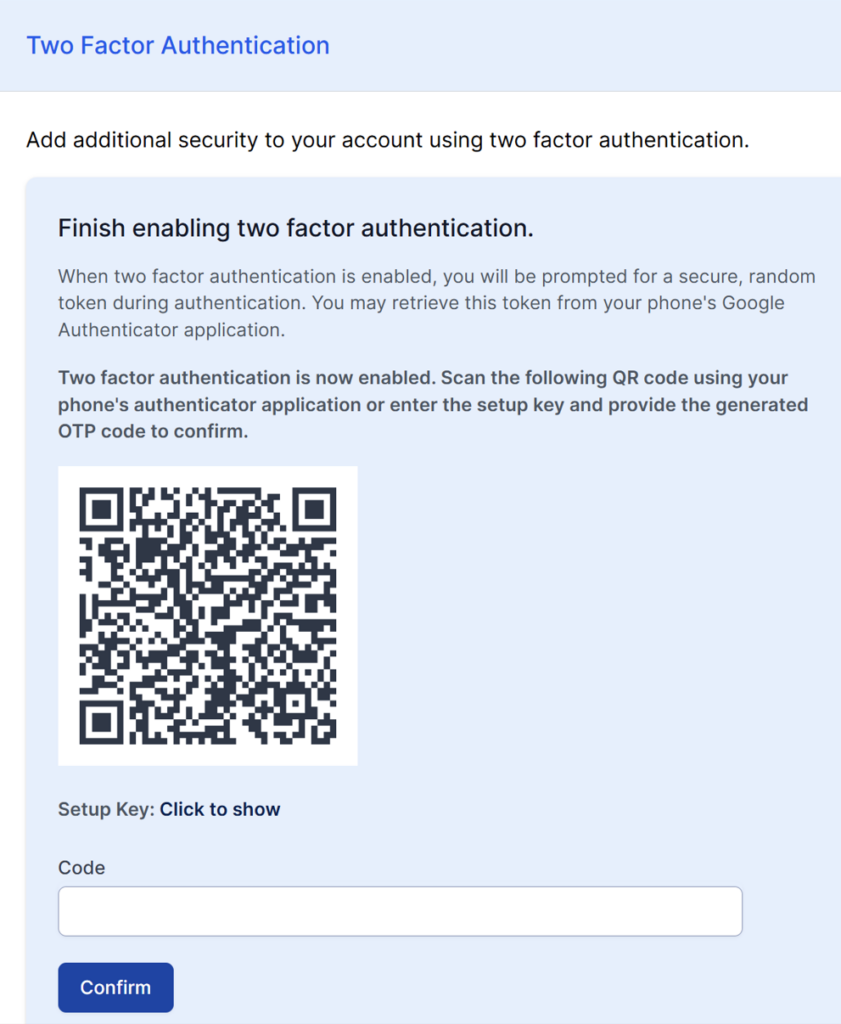
Set Up Your Authenticator App
On clicking Enable, you’ll need to connect an authenticator app to your account:
- Open your phone’s authenticator app, such as Google Authenticator.
- Scan the QR code displayed on the screen or enter the setup key manually within it.
- Enter the one-time code generated by the app into the Code field.
- Click Confirm to finish enabling two-factor authentication.
Final Setup
After adding the correct code from the authenticator app and confirming it, two-factor authentication will be active on your account.
At this stage, you’ll see a set of recovery codes. These codes allow you to regain access if you ever lose your authenticator device, so be sure to copy and save them somewhere secure before continuing.
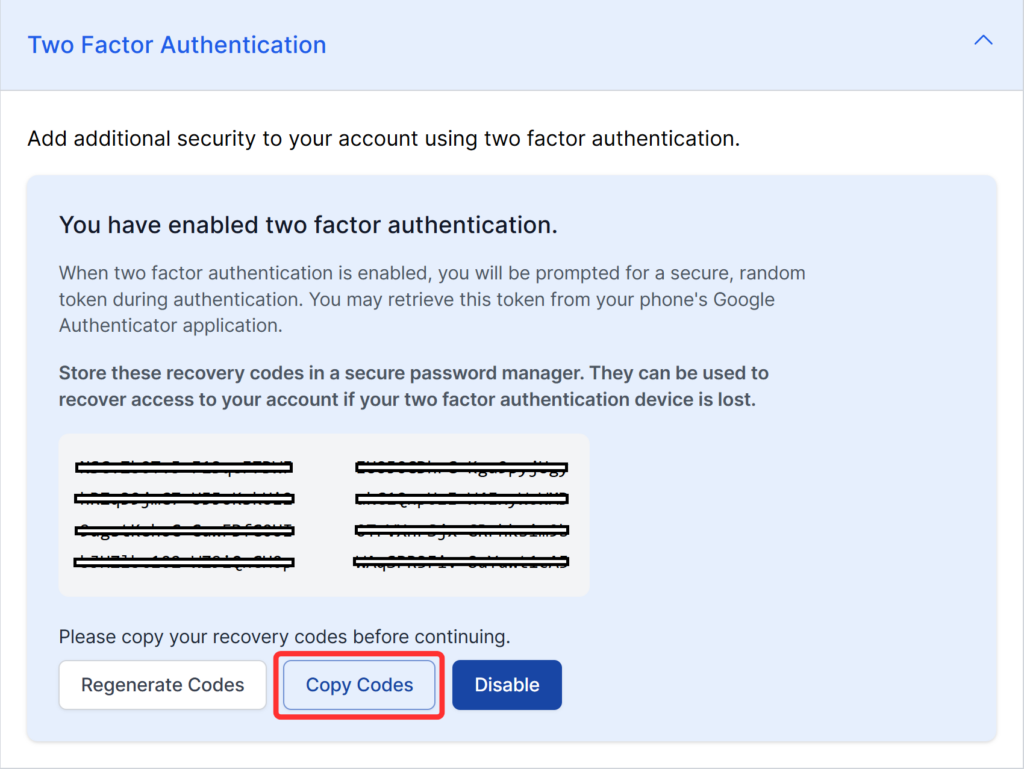
Once your recovery codes are saved, two-factor authentication is fully enabled. From now on, you’ll be prompted for a code from your authenticator app whenever you sign in.
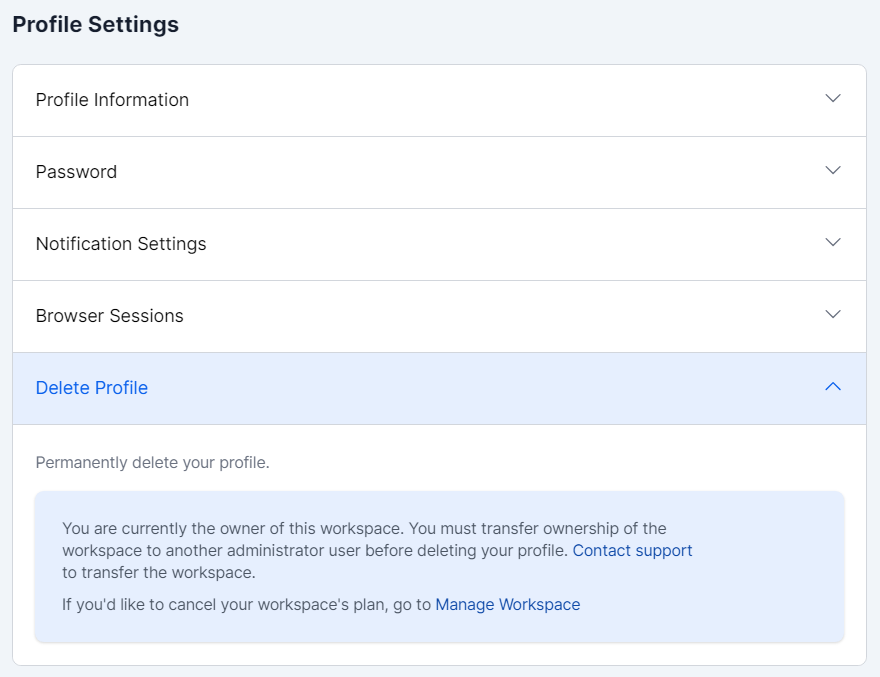
Delete Profile
To permanently delete your profile, go to the Delete Profile section. If you own a workspace, make sure to transfer ownership to another administrator before proceeding.