Access Denied – Allowlist IP Address or Header
Introduction
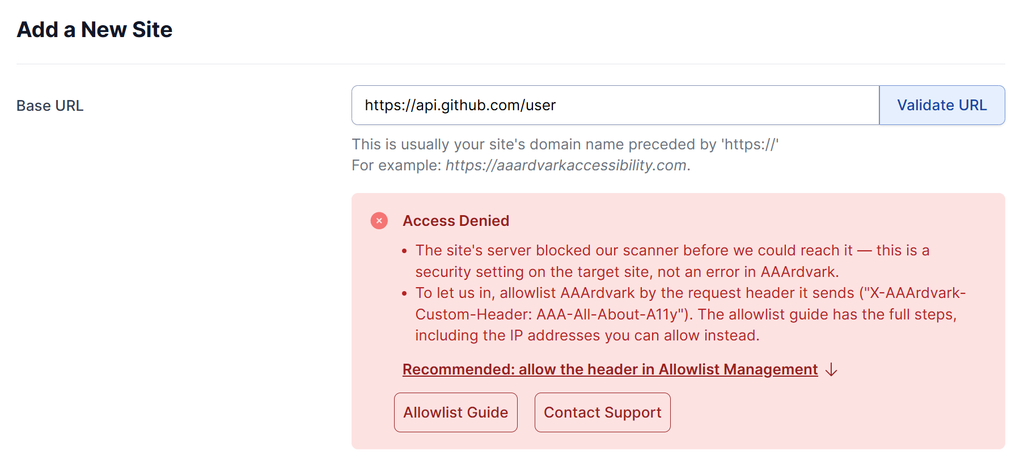
This guide explains how to resolve the Access Denied error that may appear when adding a site to AAArdvark. The block comes from your site’s server-side security settings, not from AAArdvark itself. The error message in the app tells you exactly which header to allowlist and includes a direct link to this guide.
Fix Access Denied Error by Allowlisting AAArdvark
When adding a new site to AAArdvark, you might see an Access Denied error if your site’s security tools block automated requests. This is common with platforms like Cloudflare or security plugins. There are two ways to let AAArdvark in:
- Static IP – request-based, set up by our team when you contact support.
- Custom Header – self-serve, works with any firewall or WAF that can allow by header, and covers both adding your site and every scan afterward.
If AAArdvark detects that your site is using Cloudflare, the error will also show a Cloudflare-specific message line and a Cloudflare Guide button alongside the Allowlist Guide and Contact Support buttons.
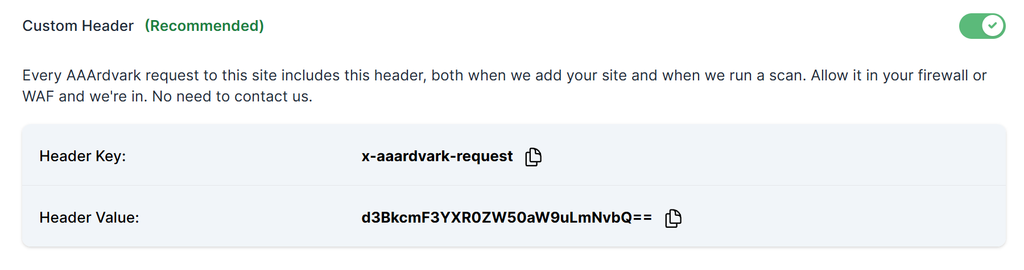
Custom Header (Recommended)
If your site blocked AAArdvark during validation, you no longer need to go looking for the allowlisting options yourself. Click the Recommended: allow the header in Allowlist Management link under the error message, and it jumps you straight to the Allowlist Management panel below, already open with your header key and value ready to copy.
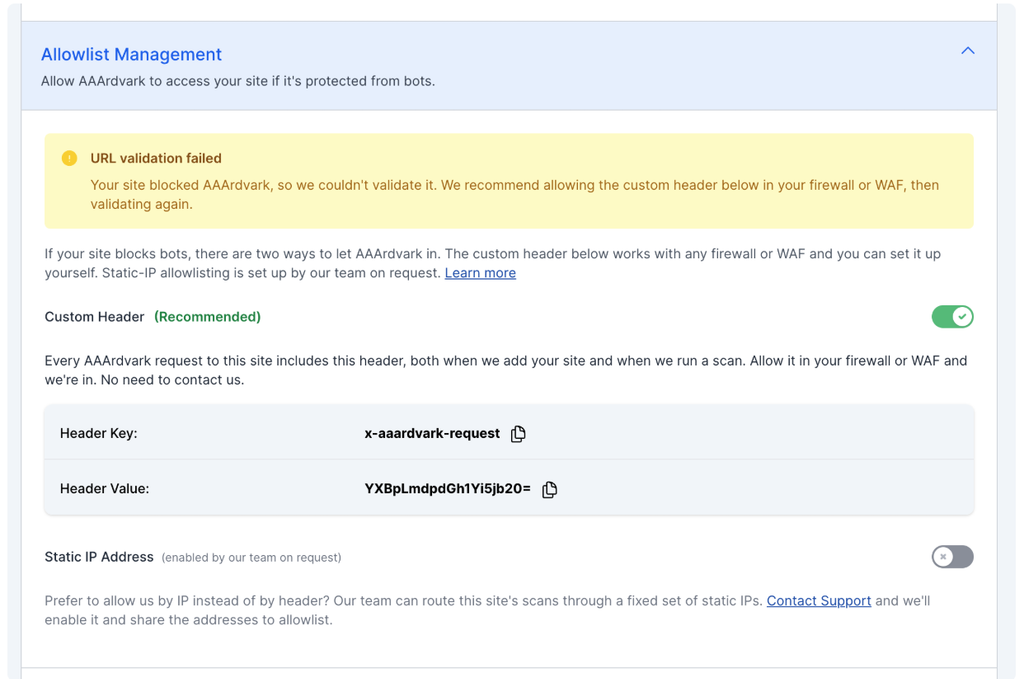
To finish setting it up:
- Copy the Header Key (
x-aaardvark-request) and Header Value (unique to your site) shown in the panel. - In your firewall or WAF, add a rule or exception that allows requests carrying this header name and value pair.
- Click Validate URL again on the Add a New Site page – you don’t need to save or start over first.
Every AAArdvark request to your site carries this header, both when adding the site and during every scan afterward, so a single header rule covers everything.
If you’re setting this up ahead of time rather than in response to an error, or need to check it for an existing site, select Customize Site Settings and open the Allowlist Management panel to find your header key and value.
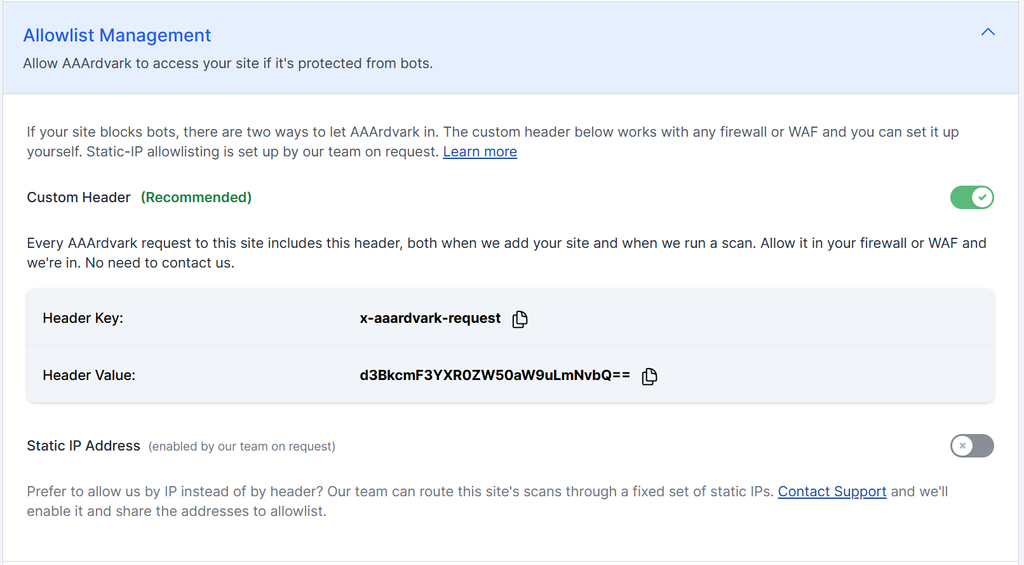
Static IP (request-based)
If your firewall or security tool can only allow traffic by IP address rather than by header, contact our support team to request static IP allowlisting for your site. Our team enables it and shares the addresses for you to add to your allowlist.
Static IP allowlisting covers your ongoing scans once our team enables it. If you’re stuck specifically at the add a site step, the Custom Header option above is the more reliable fix – it covers both the initial validation and every scan afterward, without needing to contact us first.
Cloudflare Compatibility
If you’re using Cloudflare services on your website, you may need additional configuration beyond the custom header and static IP options shown above. Check out our Cloudflare Compatibility guide for step-by-step instructions.
When the Access Denied error detects Cloudflare on your site, it will display a Cloudflare Guide button that takes you directly to those instructions.
Allow Listing Settings on Existing Sites
If you need to view or update your allowlisting settings after a site has already been created, follow these steps:
- Go to your Site Dashboard.
- Click Settings.
- Scroll to the bottom to find the Allowlisting section, where the custom header details are displayed.