Adding a Site
Introduction
Adding a new site to your AAArdvark Workspace is easy! By configuring a few key settings, you can ensure your site is optimized to take full advantage of AAArdvark’s accessibility tools.
From your dashboard, click the Add a New Site button at the top of the page.
Getting Started
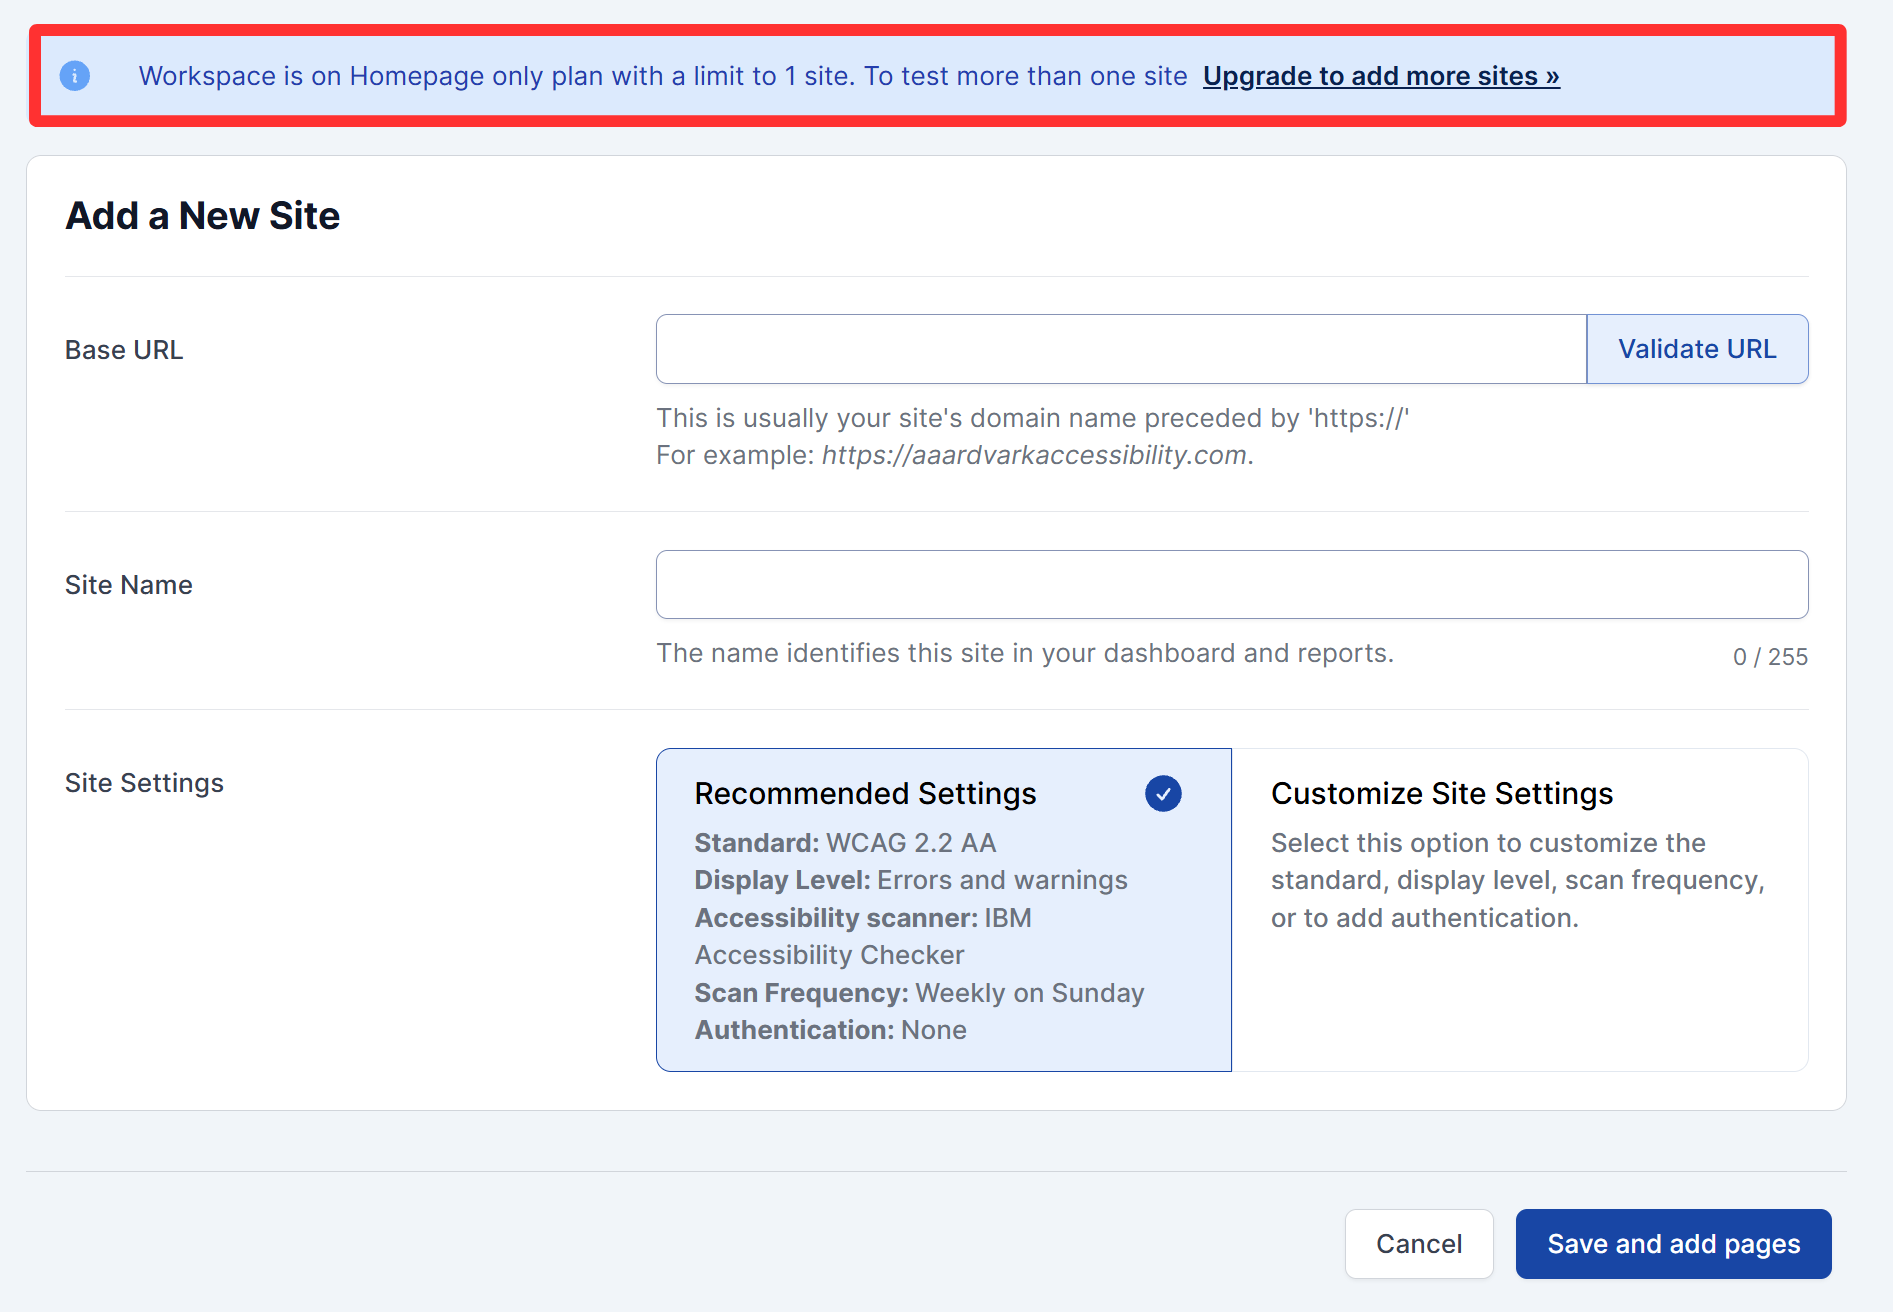
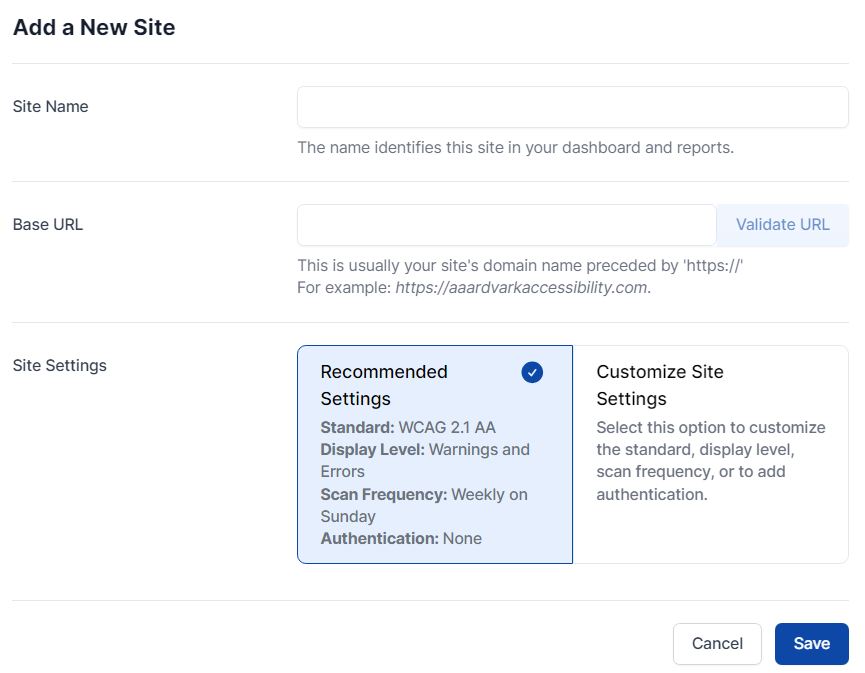
From your dashboard, click the Add a New Site button at the top of the page. When you click Add a New Site, you’ll need to provide:
- Site Name: A friendly name to identify your site. For example, use ‘AAArdvark (Development)’ or ‘AAArdvark (Production)’ if setting up multiple environments.
- Base URL: The main URL for your site. All additional page paths will use this as a prefix. Ensure the URL works and loads without errors before proceeding.
- Site Settings: Choose between AAArdvark’s recommended settings or customize them as needed.
Click Validate URL to confirm the Base URL before continuing.
Keep in mind that you can always go back and edit your Site Settings as necessary.
If your workspace is on the Homepage Only plan (limited to a single site), you’ll see this same plain form with a banner instead: “Workspace is on Homepage only plan with a limit to 1 site. To test more than one site, Upgrade to add more sites ».” Upgrading to a multi-site or multi-page plan is what unlocks the guided setup described next.
Adding a Site on a Paid, Multi-Page Plan
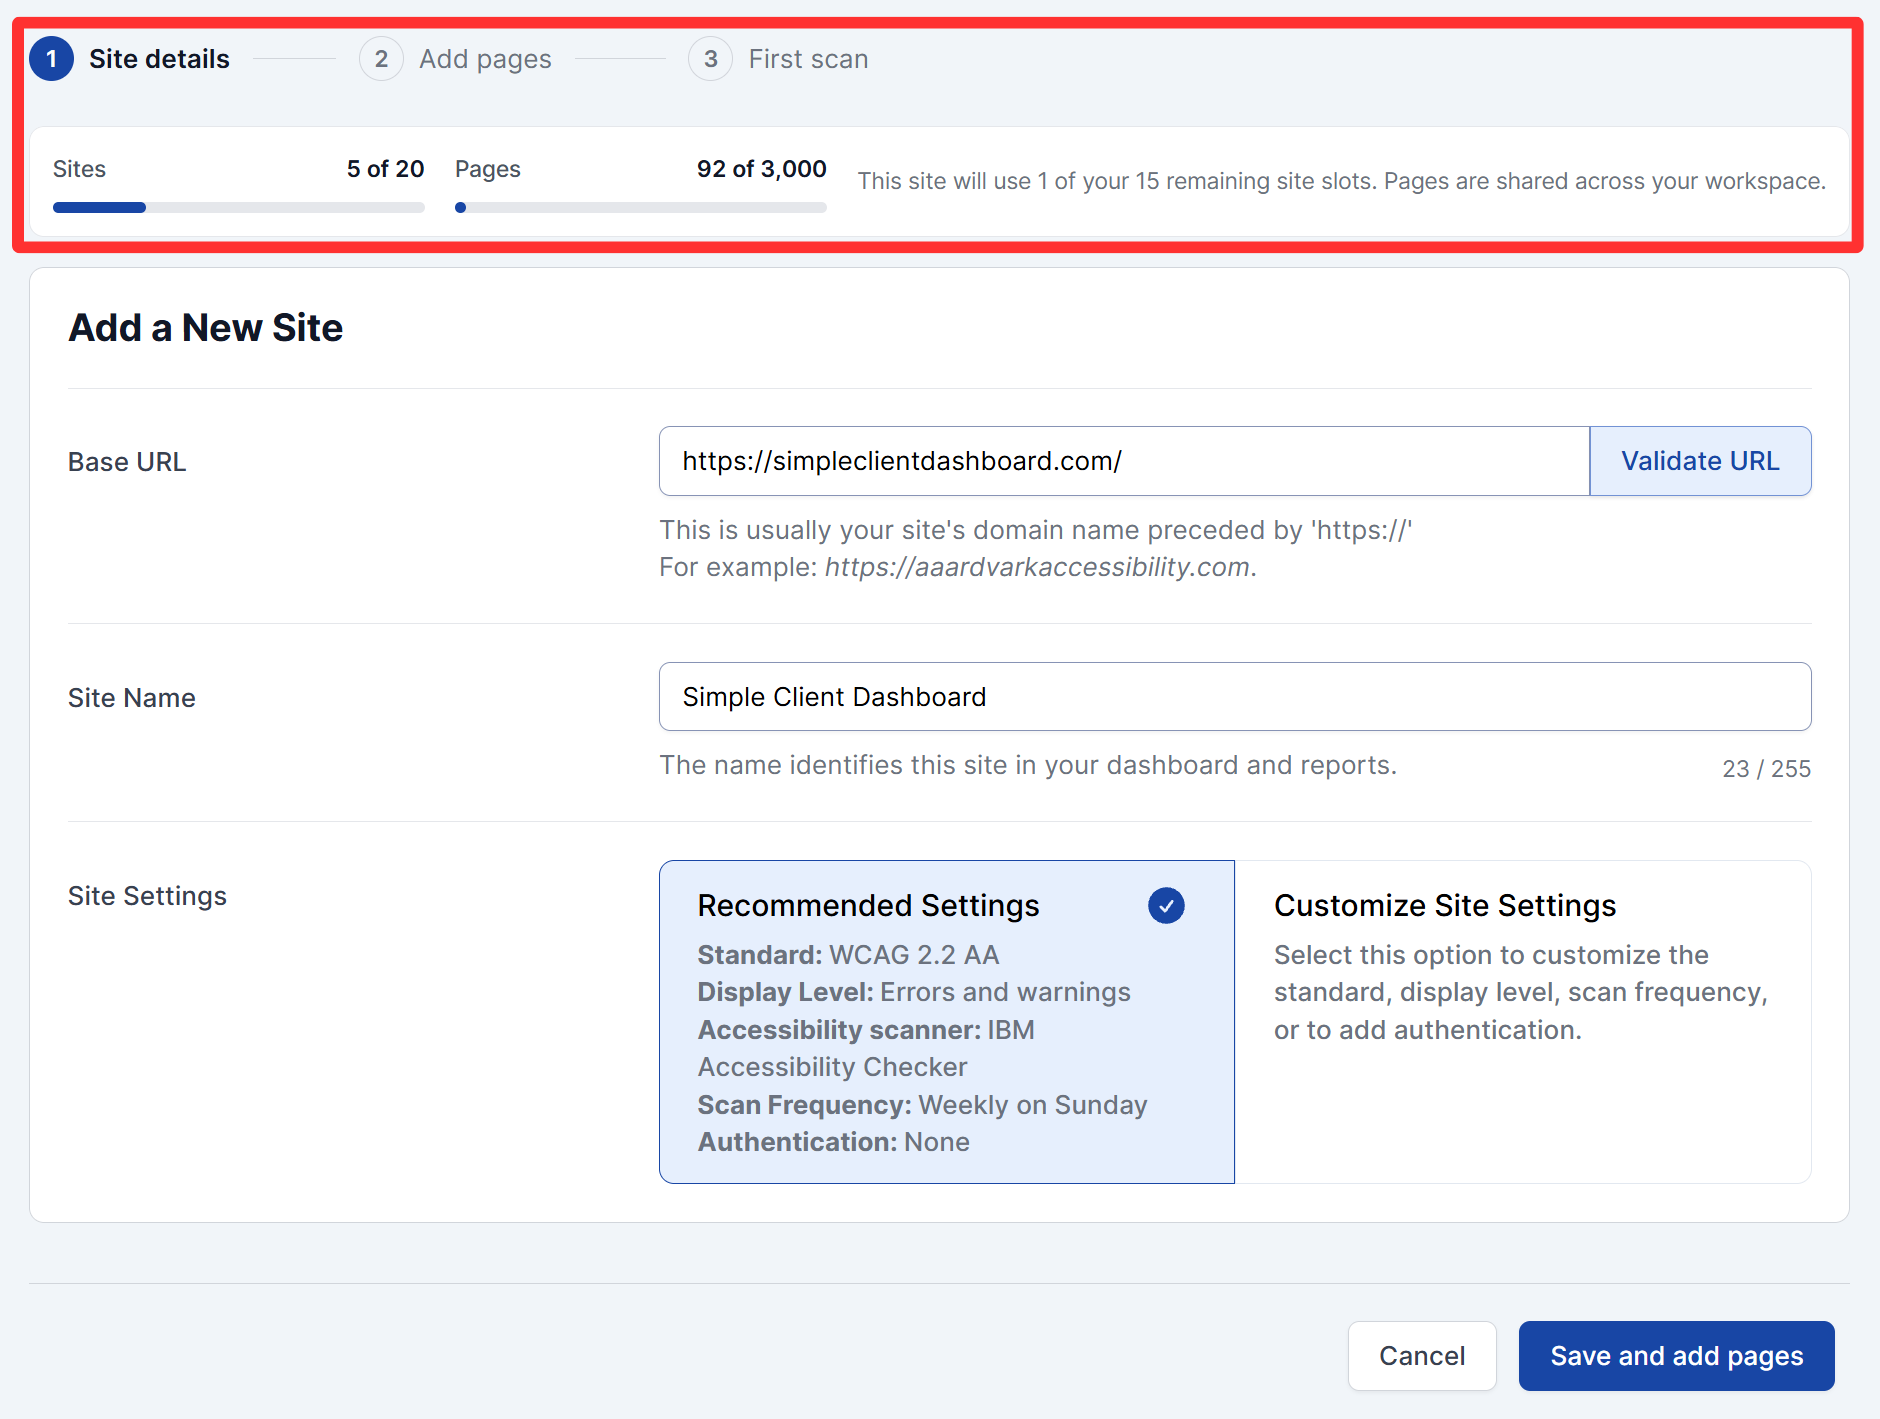
If your workspace is on a paid plan with room for more than one page, adding a site walks you through a 3-step guided setup instead of the single form above: Site details, Add pages, and First scan.
Right After You Upgrade
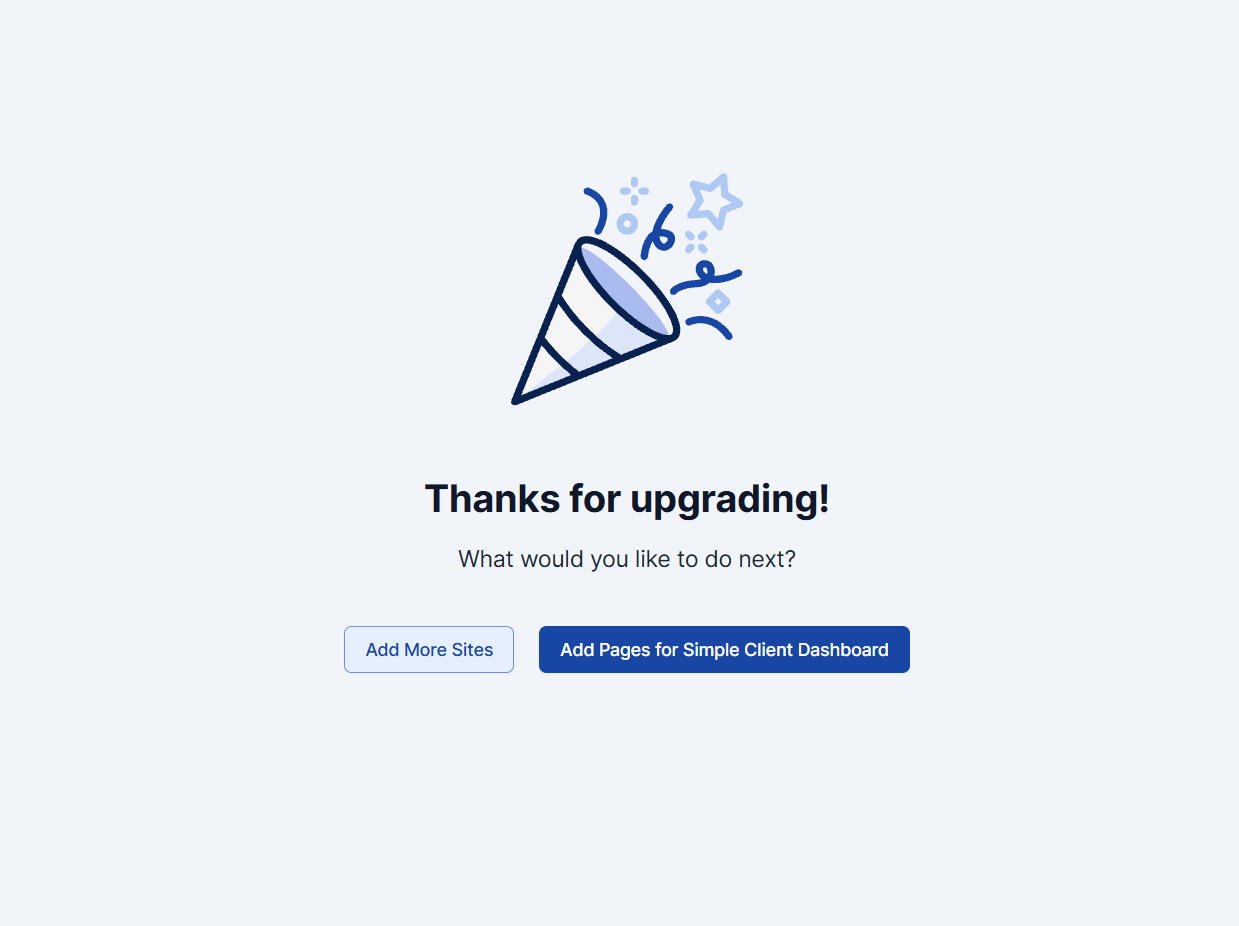
The moment your plan upgrade completes, you’ll see a “Thanks for upgrading! What would you like to do next?” screen with up to three options, depending on your workspace:
- Add More Sites: shown if your new plan has room for more sites. Takes you to the guided setup below.
- Add Pages for [Site Name]: shown if you already have at least one site. If you have more than one, this becomes a split button with a dropdown to pick which site to add pages to. Takes you straight to Step 2 (Add Pages) for that site, skipping Step 1 since the site already exists.
- Main Dashboard: shown if you have no sites yet, or if you have exactly one site and no room to add more.
If you choose to add a new site, the 3-step stepper below replaces the plain form.
Step 1: Site Details
At the top of the screen, a summary shows how many sites and pages you have left on your plan, for example, Sites: 5 of 20 and Pages: 92 of 3,000, each with its own progress bar, plus a note on how many site slots this new site will use (pages are shared across the whole workspace, not per-site).
Fill in your site details the same way as described in Getting Started above, then click Save and add pages to continue.
Step 2: Add Pages
AAArdvark briefly shows a “Checking your site for a sitemap…” loading card while it looks, then one of two states:
If a sitemap is detected:
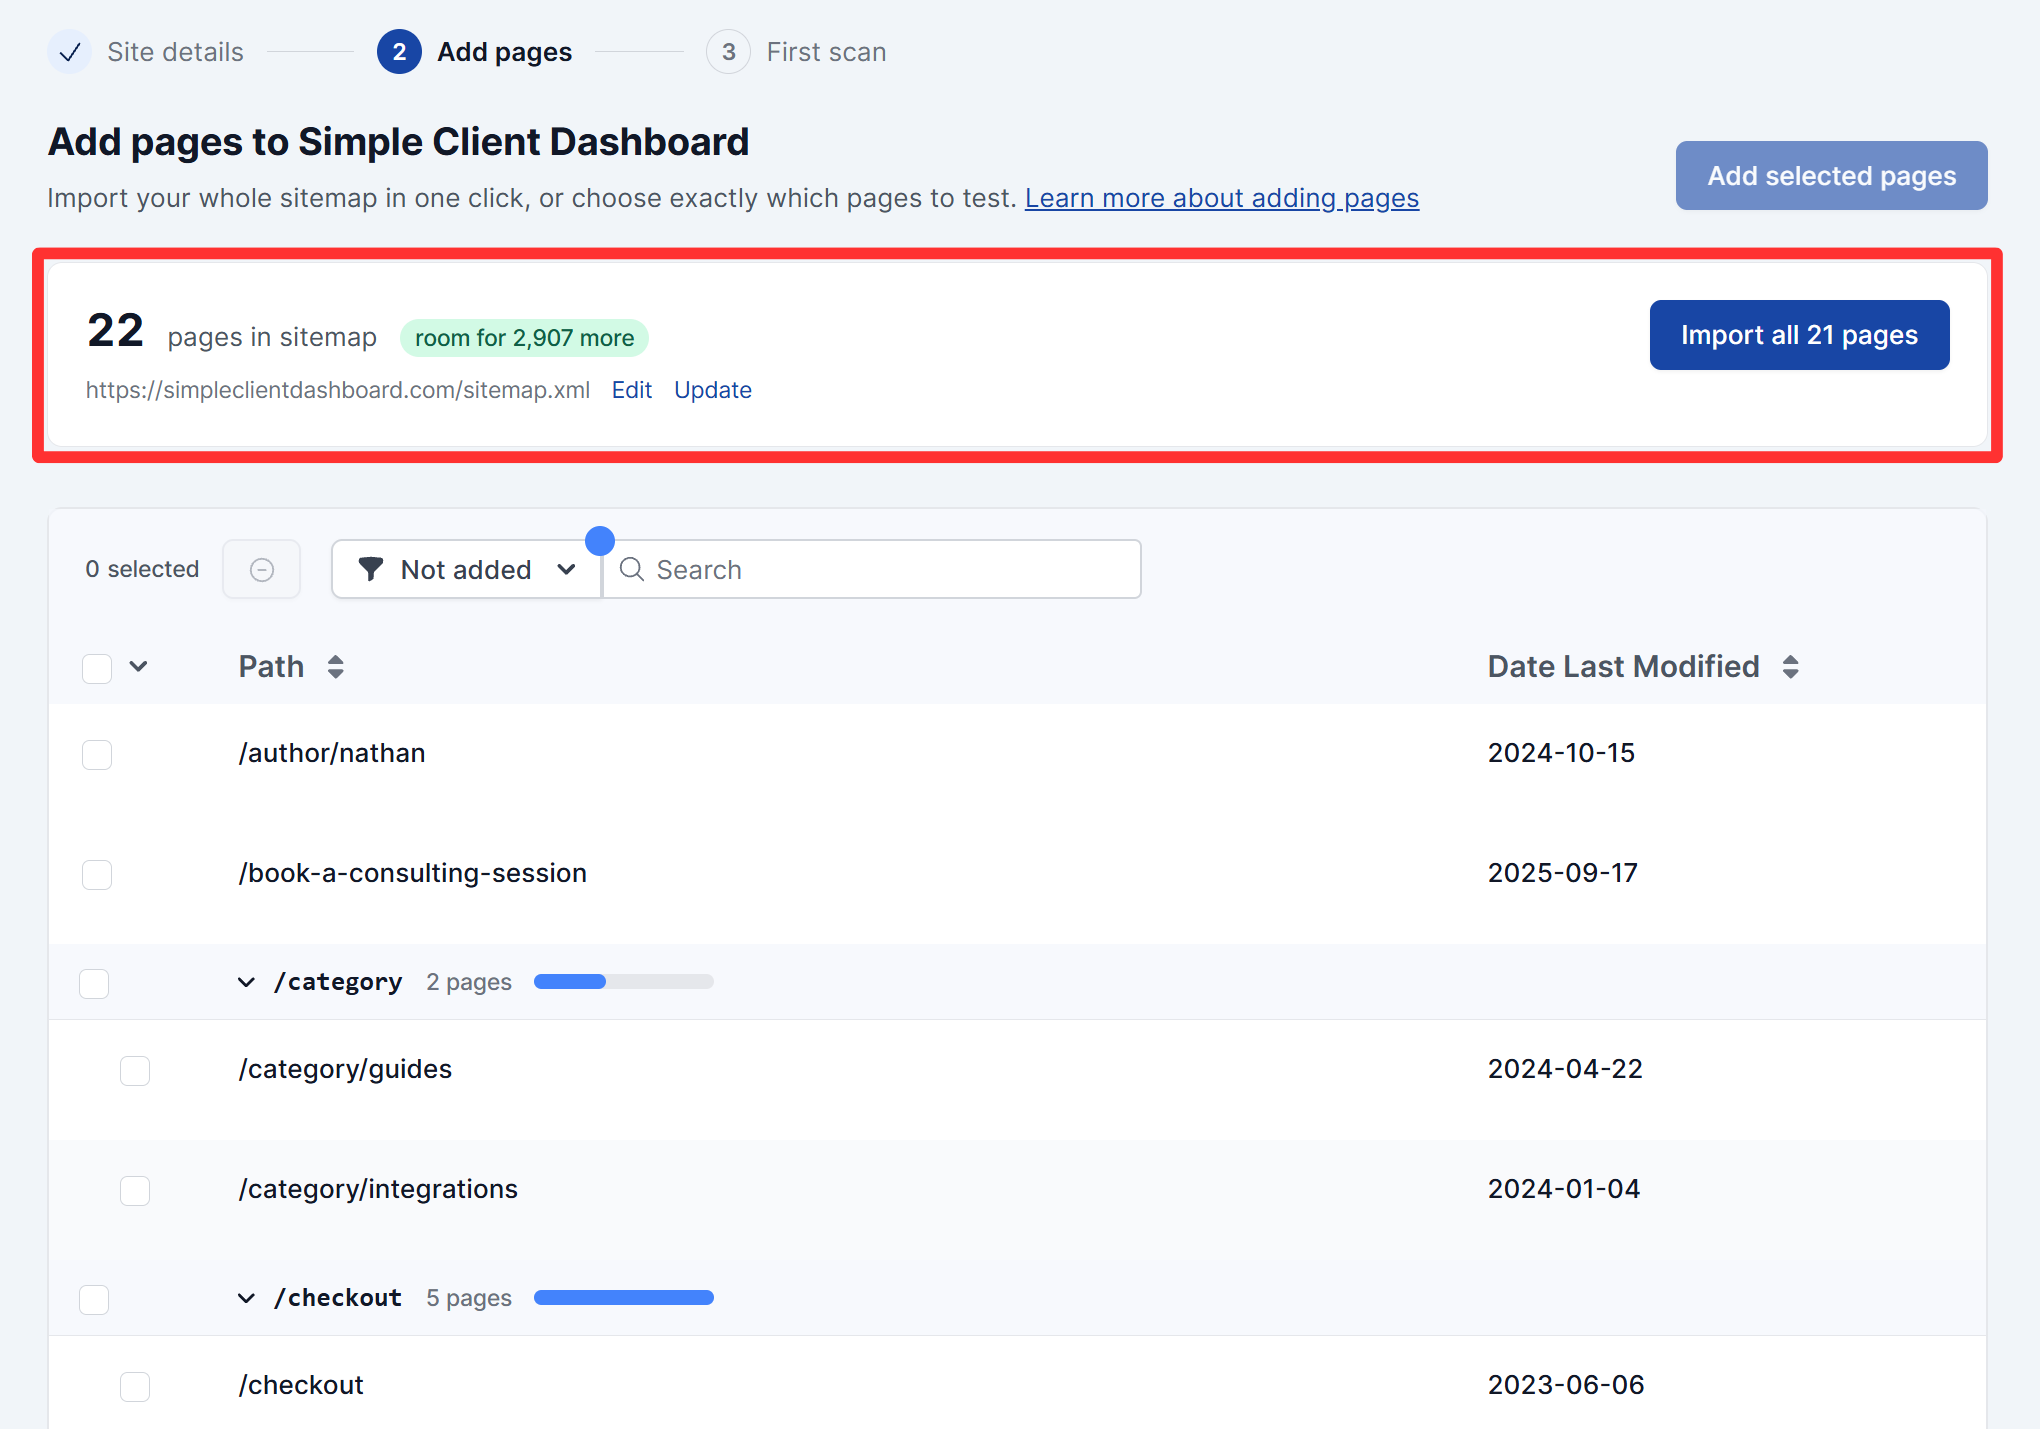
- The total number of pages found (e.g. “22 pages in sitemap”) and a room for [N] more badge showing how many additional pages your plan allows.
- The sitemap URL, with Edit and Update links to change or re-fetch it.
- An Import all [N] pages button to add every page that fits your plan in one click. If your sitemap has more pages than your plan allows, this instead reads Import the first [N], alongside a capacity meter and a Get more room on your plan link.
- The page list below, filterable (defaults to Not added) and searchable, with pages grouped by shared path, for example, a /category group showing “2 pages” with its own mini progress bar, expandable to select pages individually.
- Select individual pages or whole groups via their checkboxes, then click Add selected pages to add just your selection instead of importing everything.
If no sitemap is detected, you’ll see “We couldn’t find a sitemap automatically. Point us to one, upload it, or add pages one by one,” with three options side by side:
- Enter a sitemap URL: type a path and click Set Sitemap.
- Upload a sitemap: click Choose file to select an XML file, up to 10 MB.
- Add pages manually: click Add a page if you’d rather curate a small set of pages by hand.
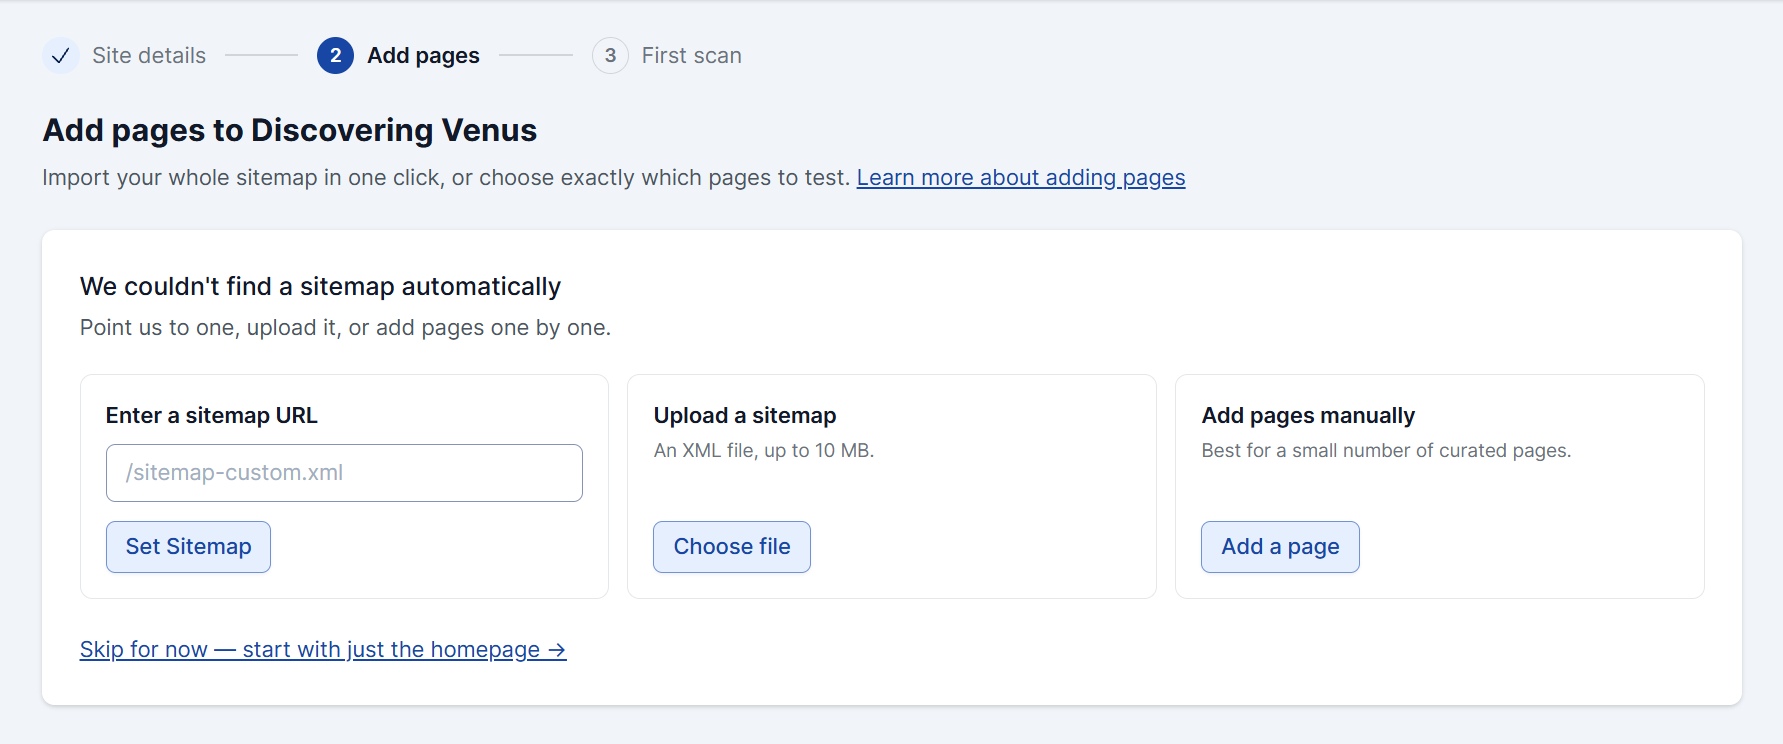
A “Skip for now — start with just the homepage” link lets you move on without adding any pages yet.
Step 3: First Scan
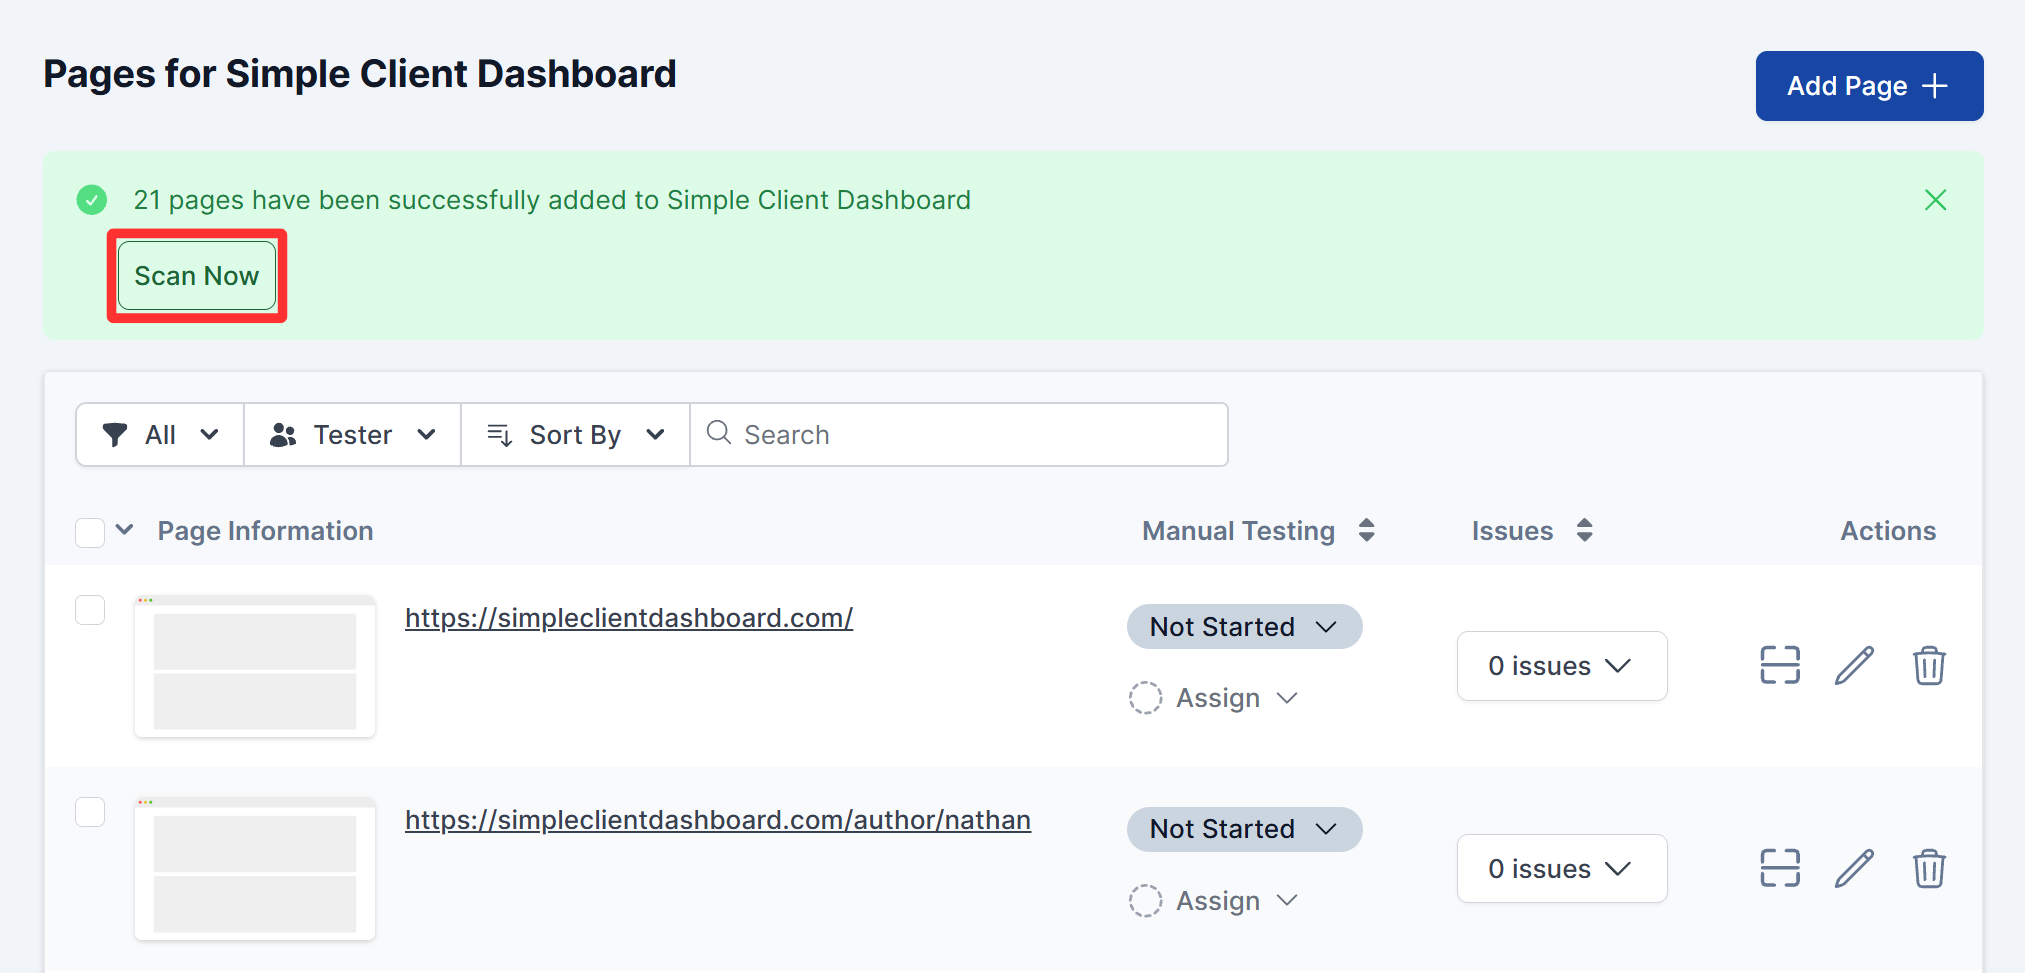
There’s no separate screen for this step. After adding pages, you land on the regular Pages screen for your site, with a success banner confirming “[N] pages have been successfully added to [Site Name]” and a Scan Now button to kick off your first scan right away.
If Your Plan Is Full
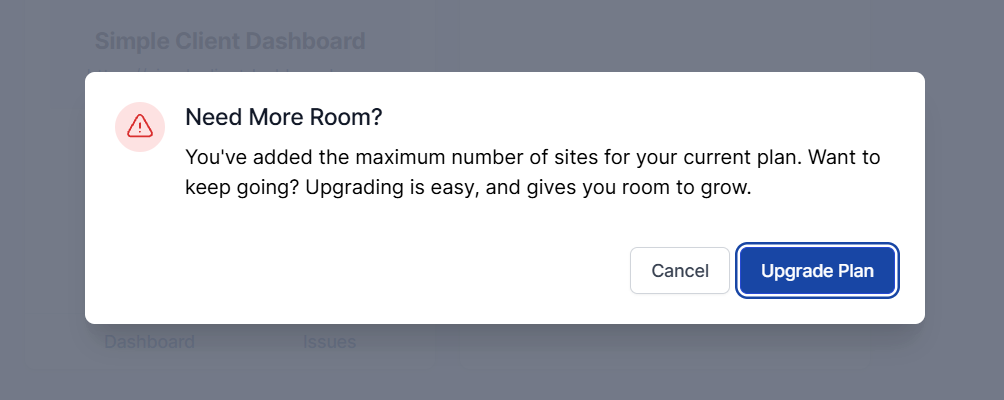
If your paid workspace has used up all its site slots, clicking Add a New Site shows a “Need More Room?” dialog instead of the form: “You’ve added the maximum number of sites for your current plan. Want to keep going? Upgrading is easy, and gives you room to grow.” From here you can click Upgrade Plan to upgrade, or Cancel to close the dialog.
Adding a subdirectory
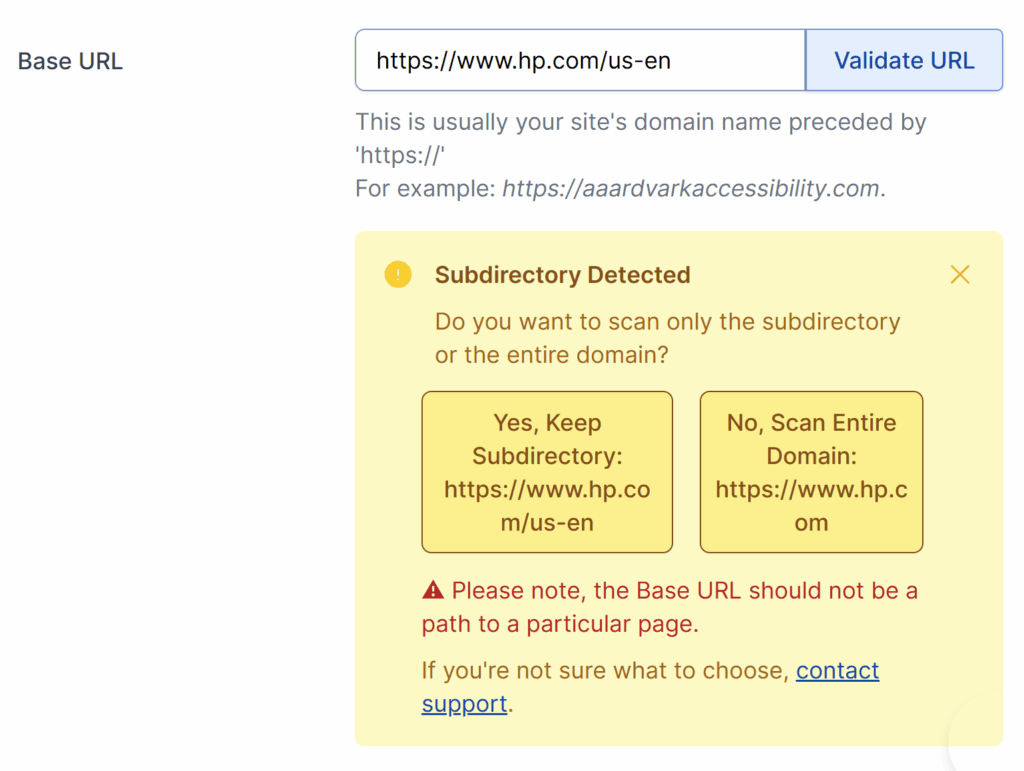
If you enter a Base URL for a domain (https://www.a20y.com) that includes a subdirectory (e.g., https://www.a20y.com/us-en), you’ll be asked to choose between:
- Keeping the subdirectory: Only pages within the subdirectory (e.g., https://www.a20y.com/us-en) will be scanned.
- Scanning the entire domain: All pages under the domain (e.g., https://www.a20y.com) will be included in the scan and will capture one or all subdirectories if they exist.
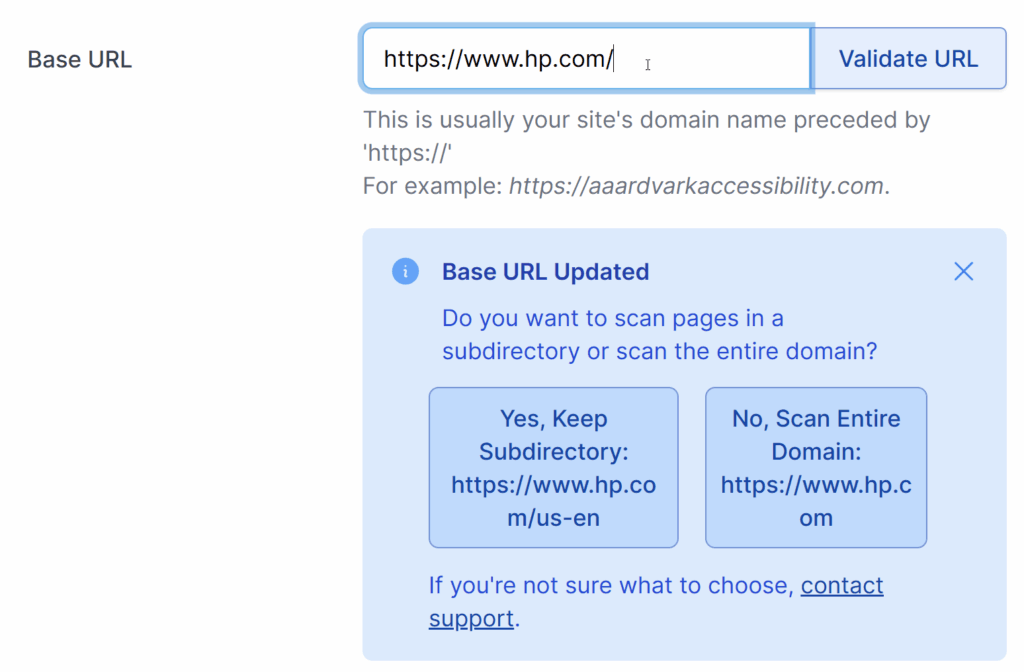
Similarly, if the Base URL you enter includes a subdirectory, you’ll be prompted to choose whether to scan just that subdirectory or the entire domain.
Recommended Settings
To get started quickly, select Recommended Settings when adding a site. These default settings are optimized for most users and include:
- Standard: WCAG 2.1 AA
- Display Level: Warnings and Errors
- Scan Frequency: Weekly on Sunday
- Authentication: None
If these settings suit your needs, you can move forward without further customization!
Customize Site Settings
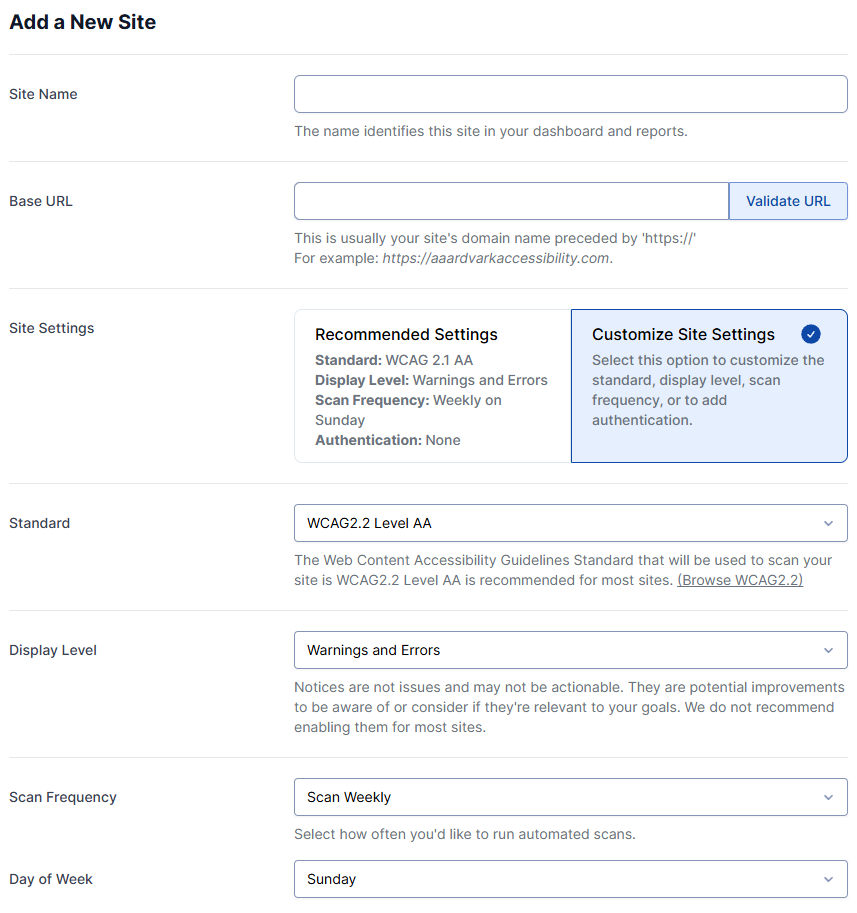
If the recommended settings don’t fit your needs, choose Customize Site Settings to tailor the configuration. Here’s what you can adjust:
- Standard: Select your preferred WCAG compliance level (e.g., WCAG 2.1 AA is recommended for most sites).
- Display Level: Decide if you want Notices to appear in the issue list.
- Scan Frequency: Choose how often automated scans run: daily, weekly, or manual only.
- Day of the Week: If weekly scans are selected, pick the day they will run.
Remember, you can update these settings later if needed.
Authentication
AAArdvark supports login-based authentication, enabling scans of pages that are not publicly accessible. You can configure authentication settings for some or all pages of a site. Available options include:
- No Authentication: Publicly accessible pages.
- HTTP Basic Authentication: Username and password required
- Login Form Authentication: Requires login via a form (e.g., username/password)
- Password Protected: Requires the password, login page URL, password selector, and submit button selector.
- Custom Header Authentication: Allows use of a custom header for authentication.
These options live in the Login & HTTP Authentication section of your Customize Site Settings.
If AAArdvark detects that the URL you’re validating requires HTTP Basic authentication (a 401 response with a Basic authentication challenge), it shows a “This site is password-protected” banner instead of a generic Access Denied error. Click Add your login credentials in the banner to jump straight to the Login & HTTP Authentication section below and add your credentials.
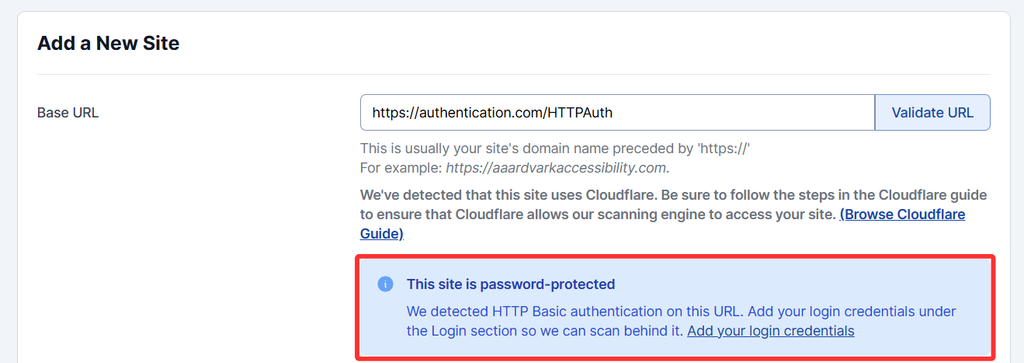
For detailed instructions, check out our Authentication Guide.
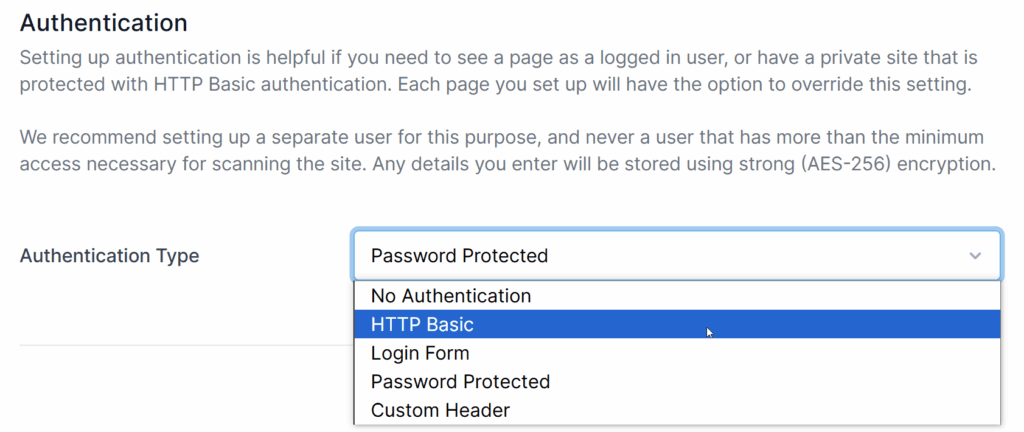
AllowListing
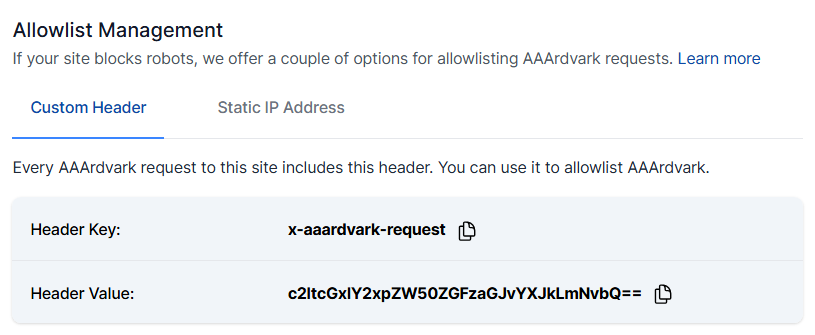
If your site’s security tools block automated requests, you can allowlist AAArdvark to allow scans. This involves creating a rule to accept requests based on:
- Custom Header: Use the Name and Value pair provided in the Allow Listing section.
- IP Address: Contact our support team to obtain the IPs used by AAArdvark.
For step-by-step guidance, refer to our Access Denied Guide.
Teams
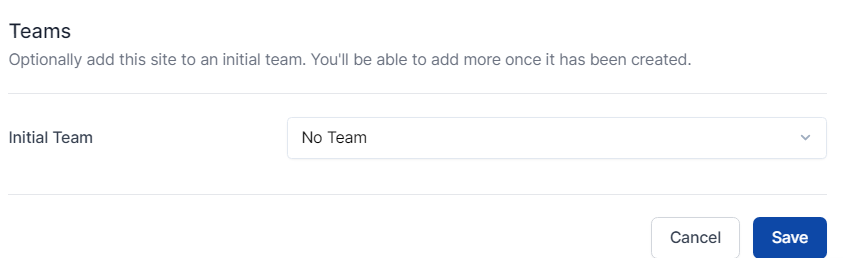
Assign your site to a specific team within your workspace to streamline collaboration. Only members of the assigned team will have access to the site.
To assign a team:
- Invite users to your workspace.
- Create a team and assign users to it.
- Select the team from the Teams dropdown when adding or editing a site.
For more details, visit our Team Settings Guide.
Request a New Site
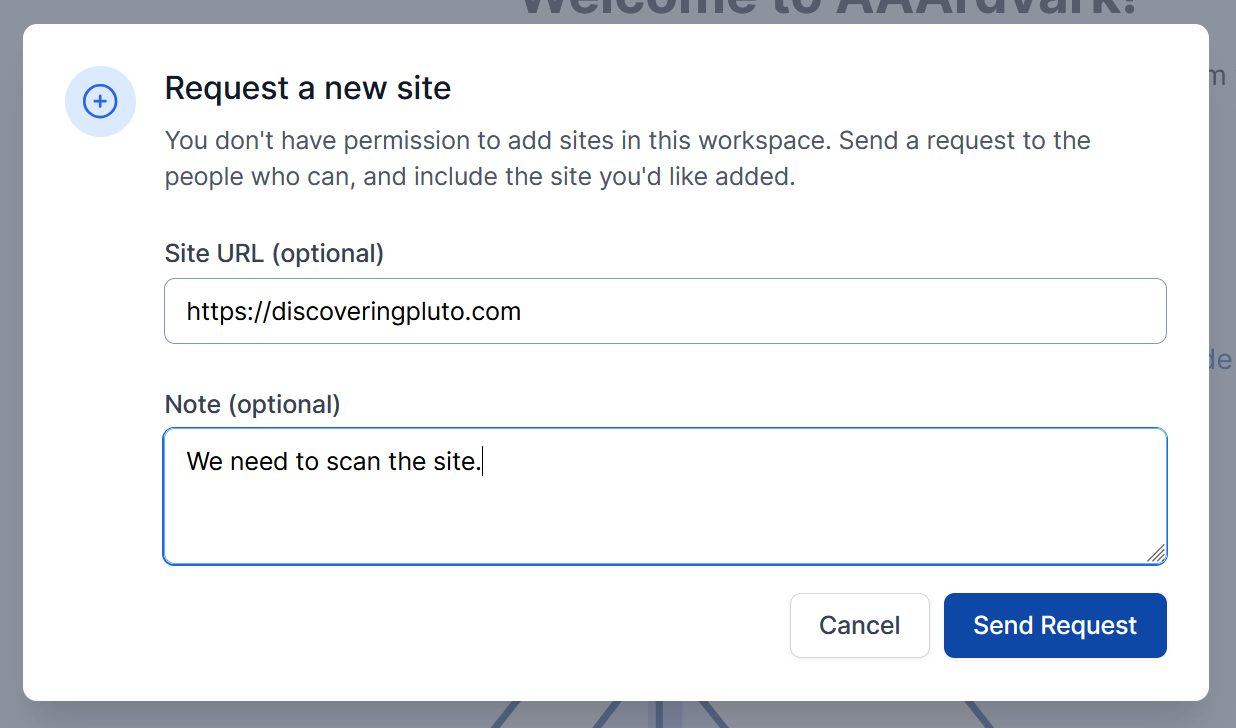
Not all roles in AAArdvark include permission to add sites directly. For a full breakdown of what each role can do, see the User Roles guide. Clients, for example, see a Request a New Site button on their dashboard instead of Add a New Site.
How to Submit a Site Request
- As a Client, click Request a New Site from your dashboard.
- In the request form, enter the URL of the site you want added.
- Optionally, add any notes in the Notes field.
- Click Send Request.
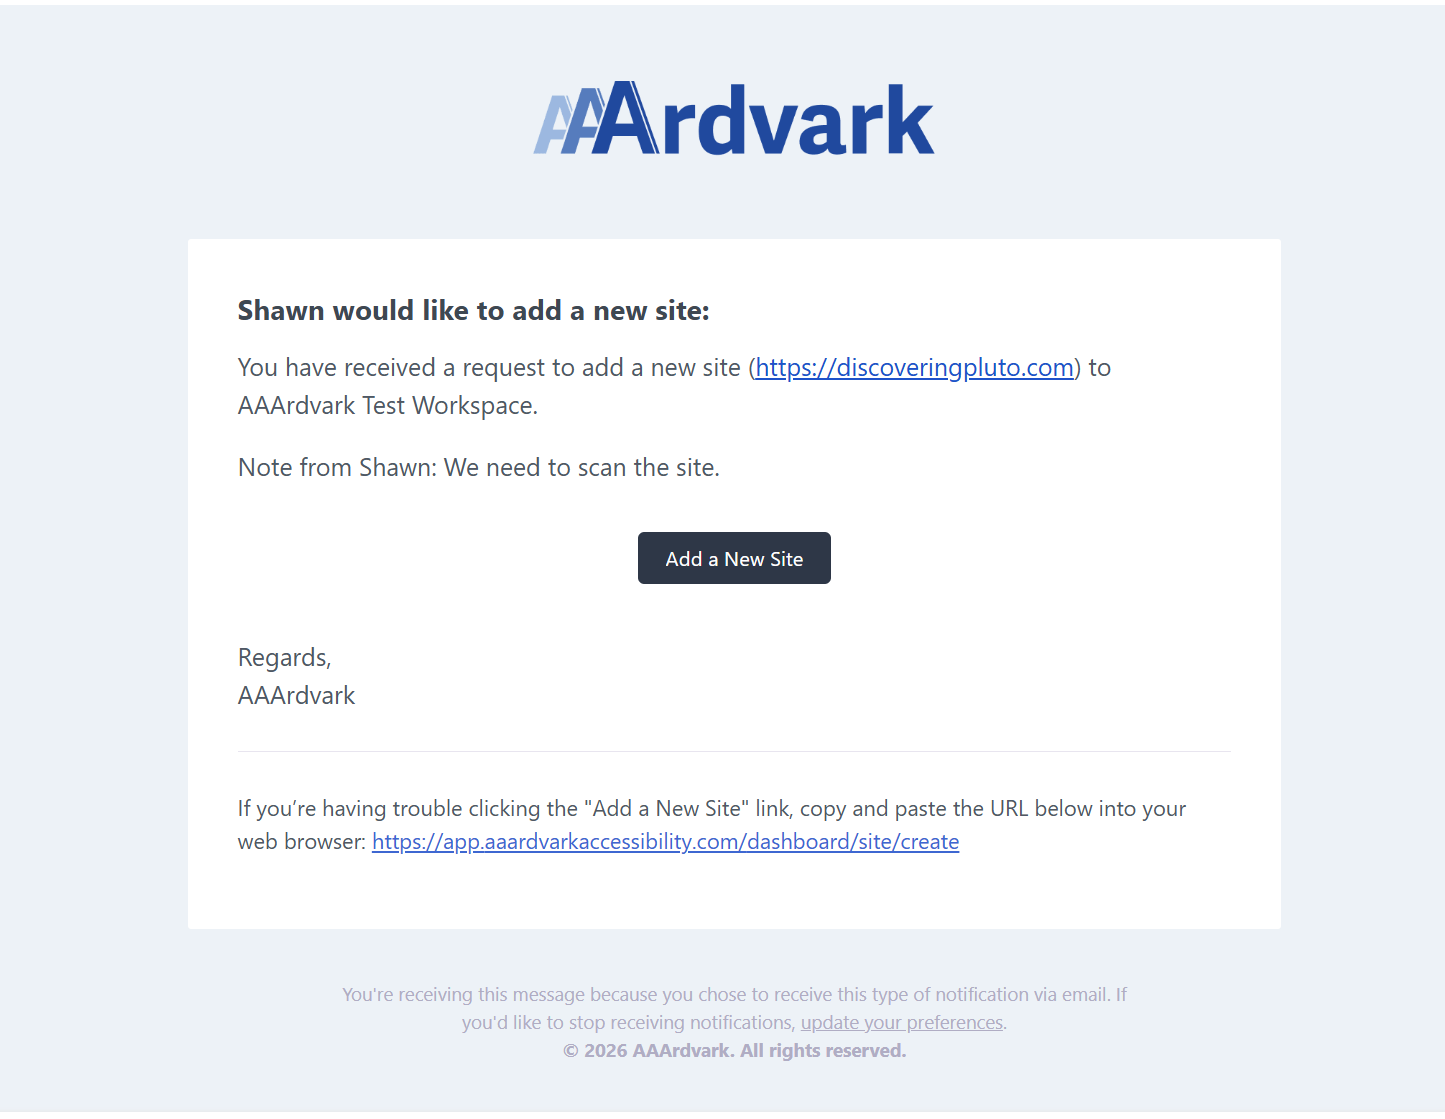
Once submitted, an email notification goes to the Workspace Owner, Administrators, and Project Managers. The email includes the site details you provided and a direct link to the Add a New Site form, where they can complete the request on your behalf.
Experimental Features
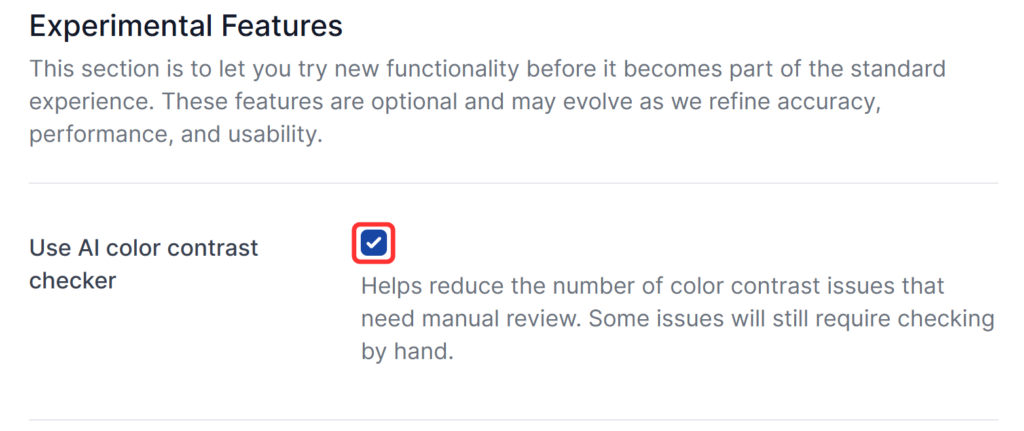
Experimental features allow you to try new functionality before it becomes part of the standard AAArdvark experience. These features are optional and may change as we continue to improve accuracy, performance, and usability for them.
AI color contrast checker
This feature helps reduce the number of color contrast issues that require manual review during accessibility testing.
When enabled, AAArdvark uses AI to analyze detected color contrast issues and identify cases that are more likely to be acceptable, allowing you to focus on higher-risk findings. Some color contrast issues will still require human review to confirm compliance, and results may change as accuracy and performance are improved.
You can enable or disable this feature from the Experimental Features section in your workspace.