Developer Workflow
Introduction
This guide walks you through the Developer workflow in AAArdvark, including how to find your assigned issues, understand what needs fixing, and track your progress through to resolution.
What a Developer Can Do
The Developer role focuses on the technical work of fixing accessibility issues. Developers in AAArdvark can:
- Assign, comment on, and update the status of Issues
- Add, update, and delete Pages and Integrations
- Update Sites
- Start automatic and manual Scans
Note: Developers cannot manage workspace users, teams, or billing. Those actions are reserved for the Project Manager, Administrator, or Workspace Owner. If you need access to a new site or need to invite someone to the workspace, reach out to one of those roles.
Getting Started
Before you can work on a site as a developer, a Workspace Owner, Project Manager, or Administrator needs to:
- Invite you to the Workspace.
- Add you to the Team that has access to the sites you’re working on.
Once added, you’ll receive an email invitation. After accepting, you’ll have access to the sites assigned to your Team.
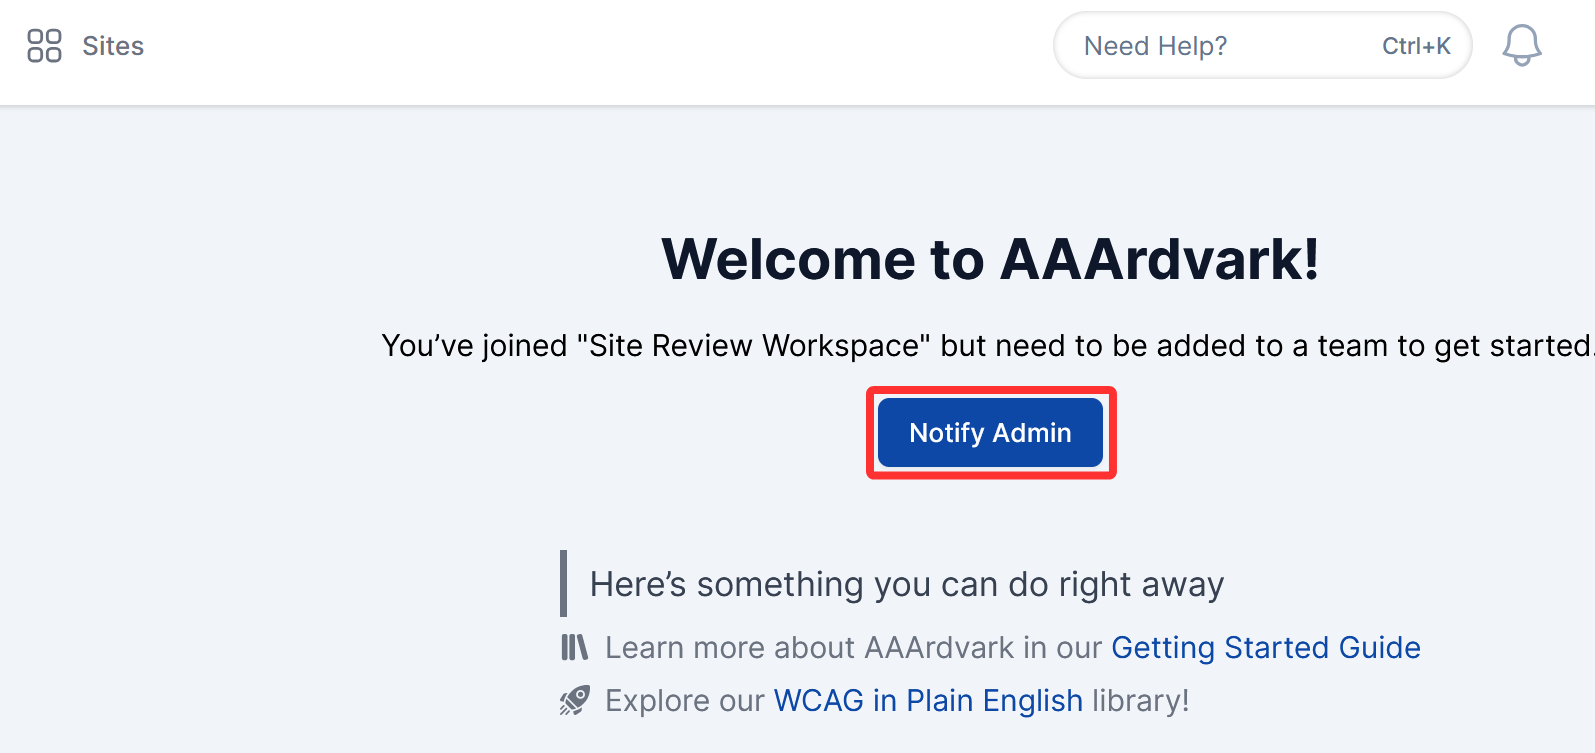
If you’ve joined the Workspace but don’t see any sites, you may not have been added to a Team yet. Click Notify Admin from your dashboard to prompt the admin to add you.
Learn more about how Teams and roles work in the Team Settings guide.
Viewing Your Assigned Issues
Once you’re in a workspace and have access to at least one site, the Issues tab on any Site Dashboard is where your work lives.
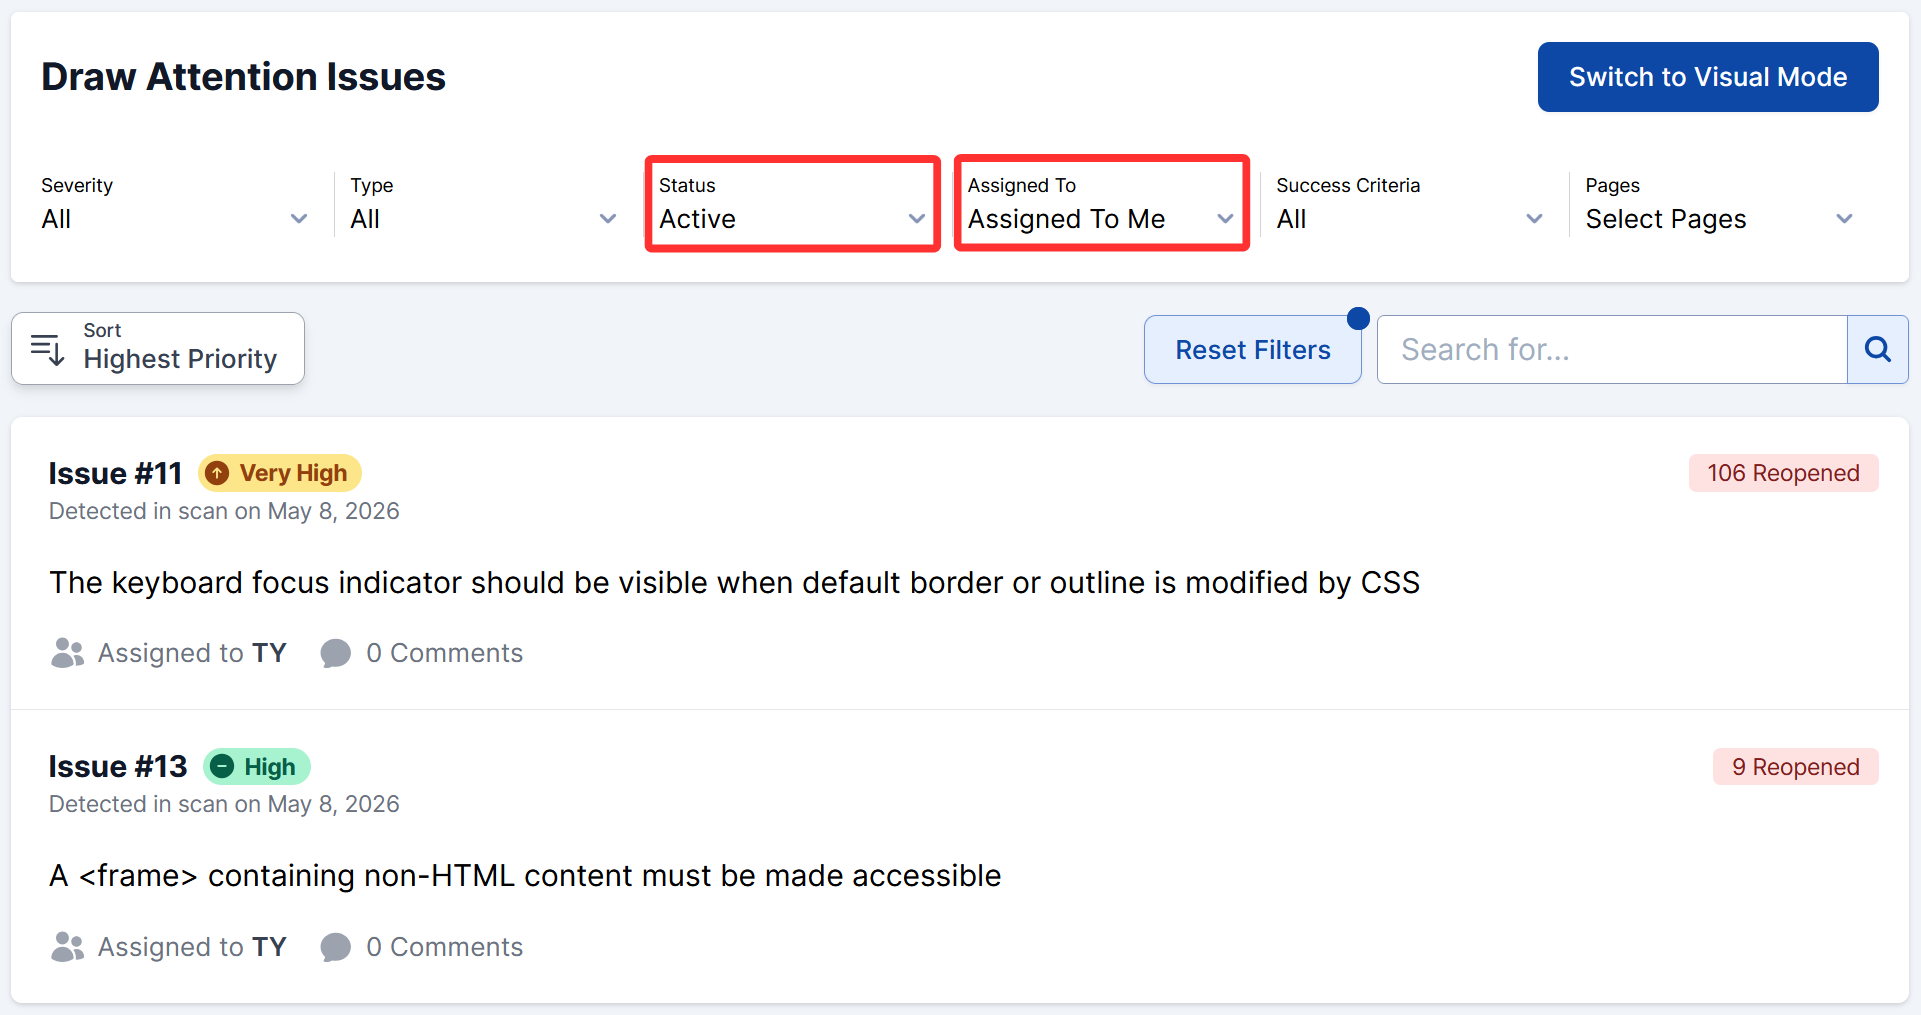
Filtering to Find Your Issues
Use the filters at the top of the Issues list to narrow down to what’s assigned to you:
- Assigned To: Select your name to see only your issues.
- Status: Filter by Active to see unresolved issues, or Pending to see fixes waiting for review.
- Type: Switch between Automatic (found by scans) and Manual (logged by an Accessibility Tester).
Learn more about filtering and sorting in the Understand and View Issues guide.
Reading an Issue
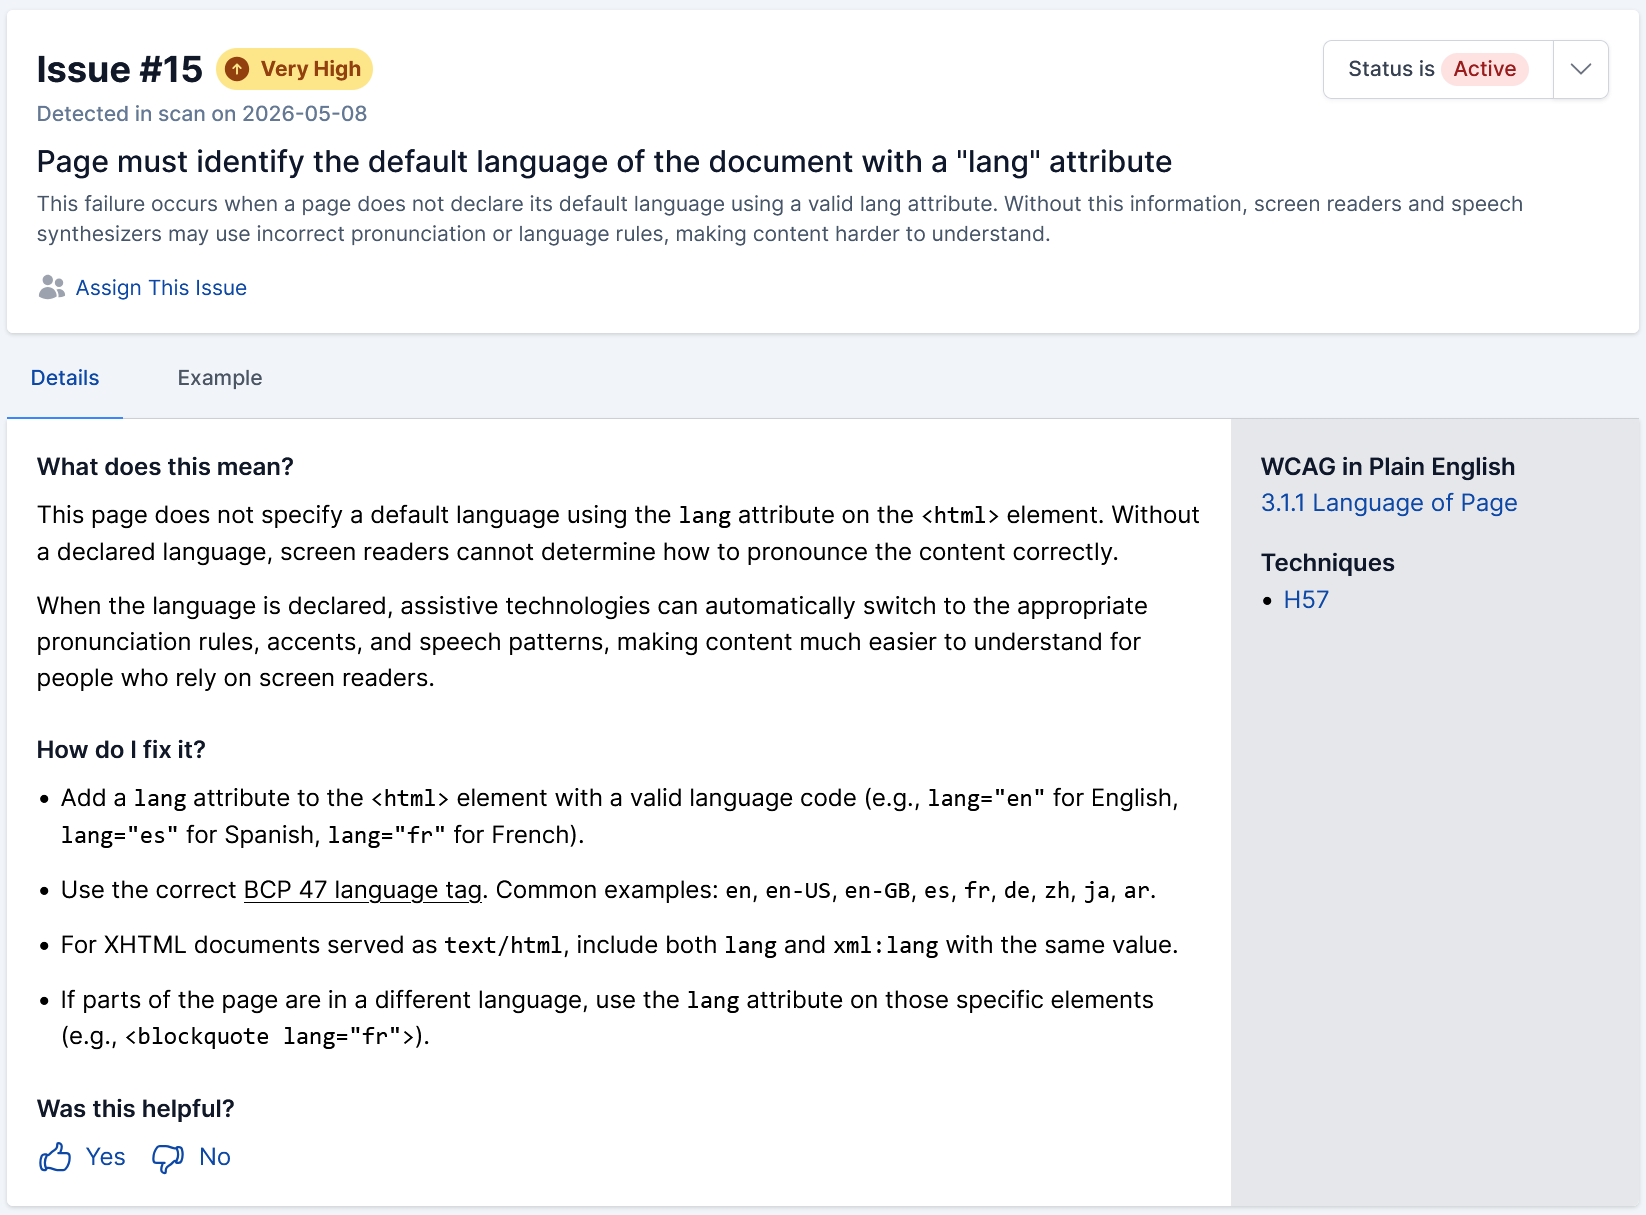
Click any issue to open the detail view. Each issue includes:
- Description: The WCAG failure title describing the accessibility problem (e.g., “Elements must meet minimum color contrast ratio thresholds”).
- Recommendations: Suggested fixes and implementation guidance.
- Instances: Every place this issue appears on the site, with the code snippet and a screenshot of where it was found. Click any instance URL to open that page directly in Visual Mode, where you can see the issue highlighted in context on the live page.
- Comments: Notes from your team, including anything an Accessibility Tester may have flagged.
- Status: The current state: Active, Pending, or Resolved.
Fixing Issues
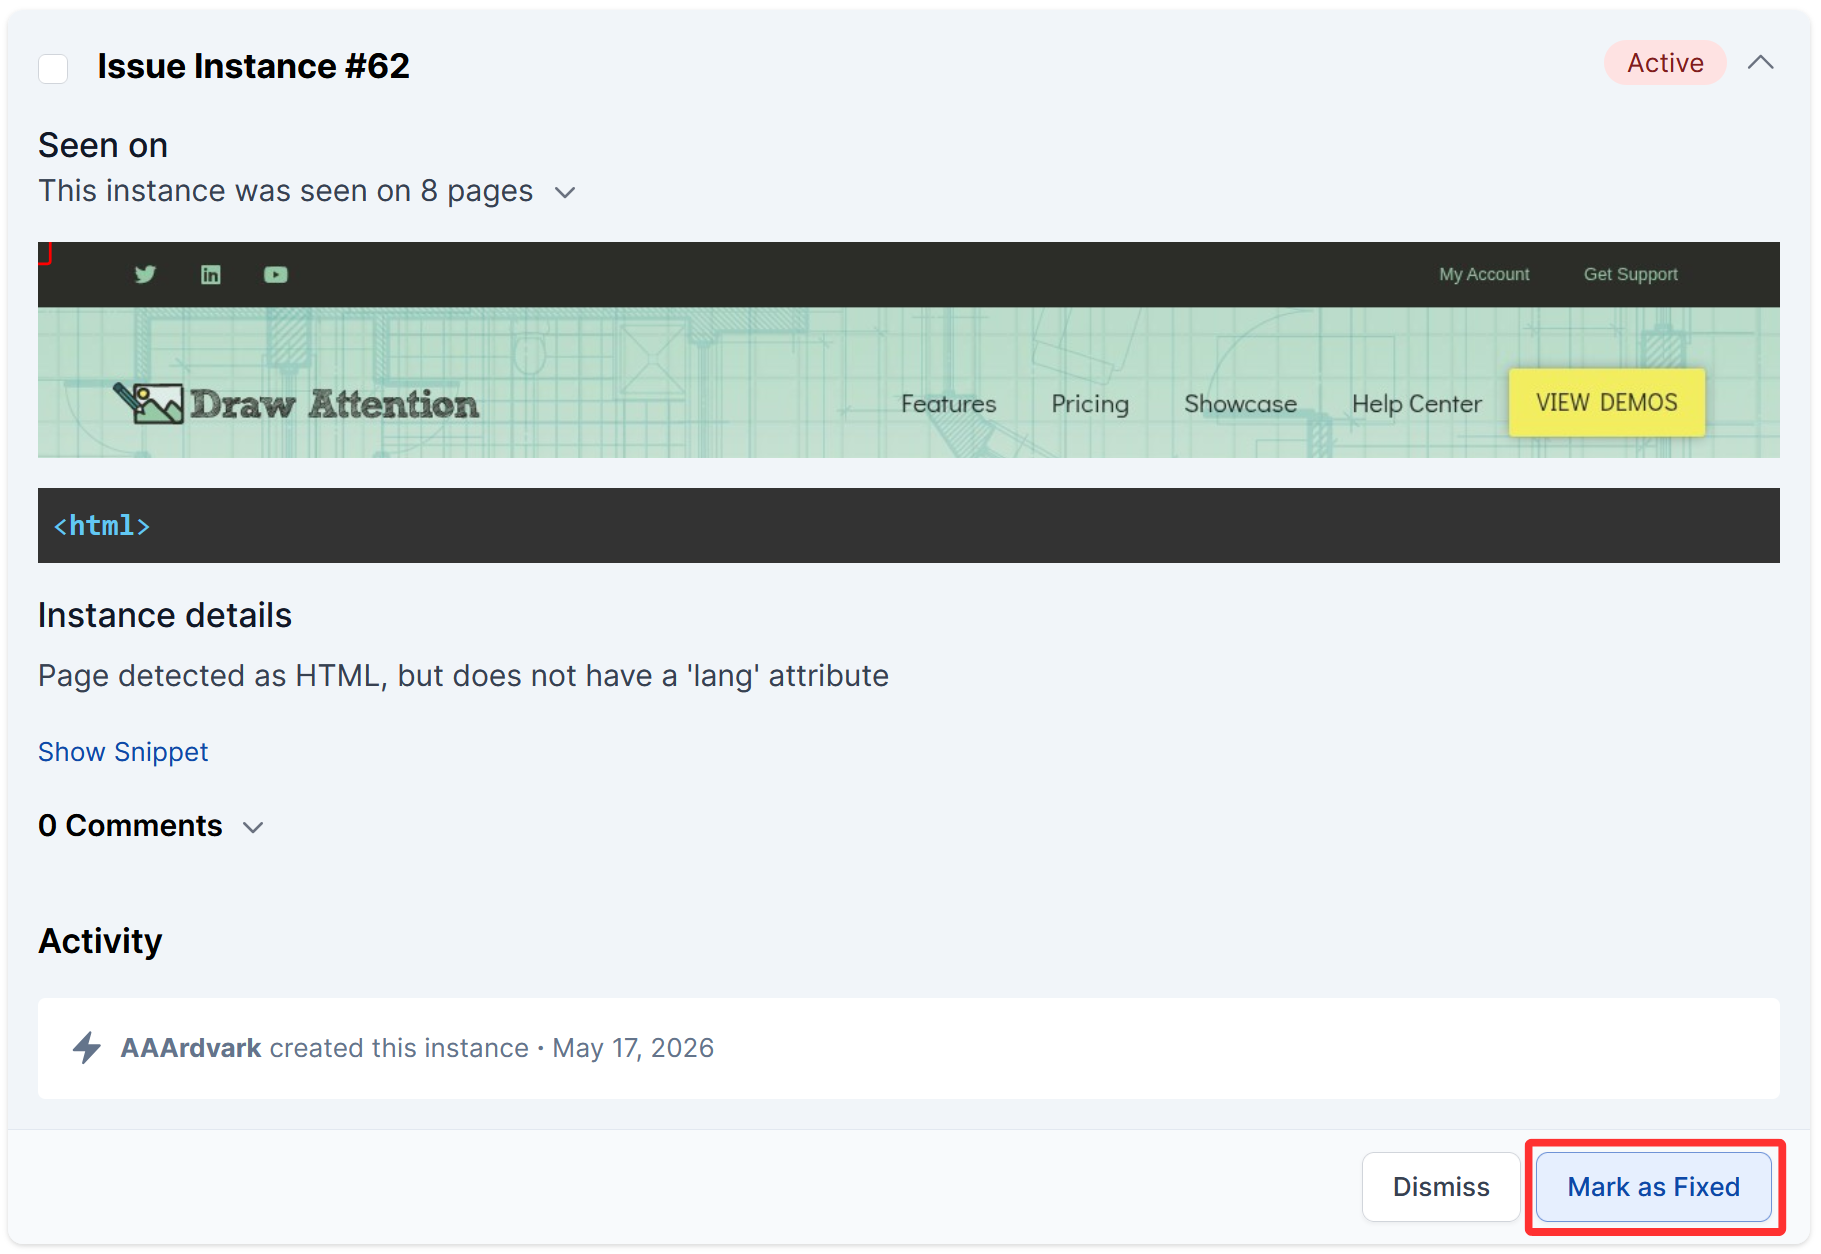
Marking Instances as Fixed
Once you’ve addressed an instance in your code, mark it as Fixed in AAArdvark:
- Open the issue and find it in the Instances list.
- Click Mark as Fixed.
For automated issues, the fix is confirmed on the next scan. For manual issues, marking an instance as Fixed sends it to an Accessibility Tester for verification. They’ll confirm the fix meets WCAG standards and mark it Resolved, or reopen it if something still needs attention.
If a fix is seen in a subsequent scan, it will be marked Reopened so you can take another look. When all instances are confirmed fixed or marked as Not an Issue, the issue is automatically set to Resolved.
Marking an Entire Issue as Resolved
If you’ve addressed all instances of an issue at the source (for example, fixing a template that affected multiple pages), you can mark the whole issue as Resolved using the status dropdown in the top-right of the issue page.
The next scan will confirm the fix. If any instances reappear, the issue will be automatically reopened.
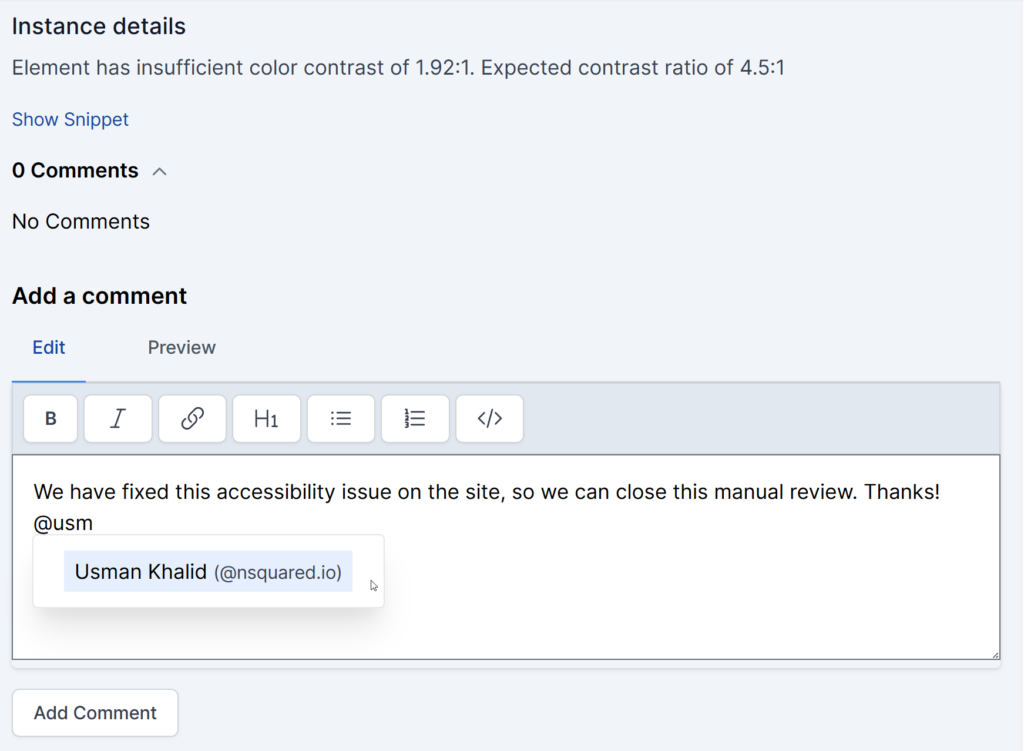
Communicating with Your Team
Use the Comments tab on any issue to leave notes for your team. You can @mention Accessibility Testers or Project Managers to flag a question or update. Tagged members will receive a notification if they have email alerts enabled.
Learn more in the Fix and Manage Issues guide.
Managing Pages and Integrations
Adding and Updating Pages
Developers can add pages to a site, edit page settings, and delete pages no longer in scope. From the Pages tab on the Site Dashboard:
- Add a page: Use the Add a Page menu to add pages manually or via sitemap upload.
- Edit a page: Update the page path, configure authentication settings for login-protected pages, or set a scan delay for slow-loading content.
- Delete a page: Remove pages that are no longer part of the site’s scope.
Learn more in the Adding Pages guide.
Managing Integrations
Developers can add and configure integrations from the Site Settings. This includes webhooks and API connections that connect AAArdvark to your existing workflow tools.
Learn more in the API Integrations guide.
Running Scans
Developers can trigger scans manually from the Pages tab or from within Visual Mode.
Visual Mode requires the AAArdvark browser extension. Install it for Chrome, Edge, or Firefox before getting started.
To scan a single page, click the Scan icon next to the page in the Pages list. To scan multiple pages at once, select them using the checkboxes and use the batch action. You can also run a full site scan.
After a scan completes, the Issues list will update to reflect any new findings or confirmed fixes.
Learn more in the Automated Scans guide.
Next Steps
Once you’ve marked your fixes, the workflow moves to your Accessibility Tester, who will confirm manual issue resolutions, and then to automated scans that verify code-level fixes. Keep an eye on the Pending status filter to track what’s waiting for review.
For a full picture of how the remediation process works end-to-end, see the Automated Testing Workflow and Manual Testing Workflow guides.
Related Guides
-

Project Manager Workflow
-
Accessibility Team Workflow
-
Automated Testing Workflow
-
Manual Testing Workflow