Project Manager Workflow
Introduction
If you’re managing accessibility projects in AAArdvark, this guide walks you through how to set up your workspace, coordinate your team, and keep remediation moving from kickoff to resolution.
What a Project Manager Can Do
The Project Manager role is built for people who run projects rather than perform audits. As a Project Manager, you can:
- Assign, comment on, and update the status of Issues.
- Invite Accessibility Testers, Developers, Project Managers, and Clients to the Workspace.
- Manage teams.
- Add, update, and delete Sites, Pages, and Integrations.
- Update Roles and remove Users (Accessibility Testers, Developers, Project Managers, and Clients)
- Start automated Scans.
- Participate in manual testing alongside Accessibility Testers
- Access, manage, and create Site Tags.
- Log Manual Issues during testing, including Custom Manual Issues for failures that aren’t in AAArdvark’s predefined library.
Project Managers cannot manage billing or workspace plan settings – those actions are reserved for the Workspace Owner.
For a full list of permissions across all roles, see the Team Settings guide.
Setting Up a Project
Before your team can start auditing, set up the workspace so everyone has access to the right things.
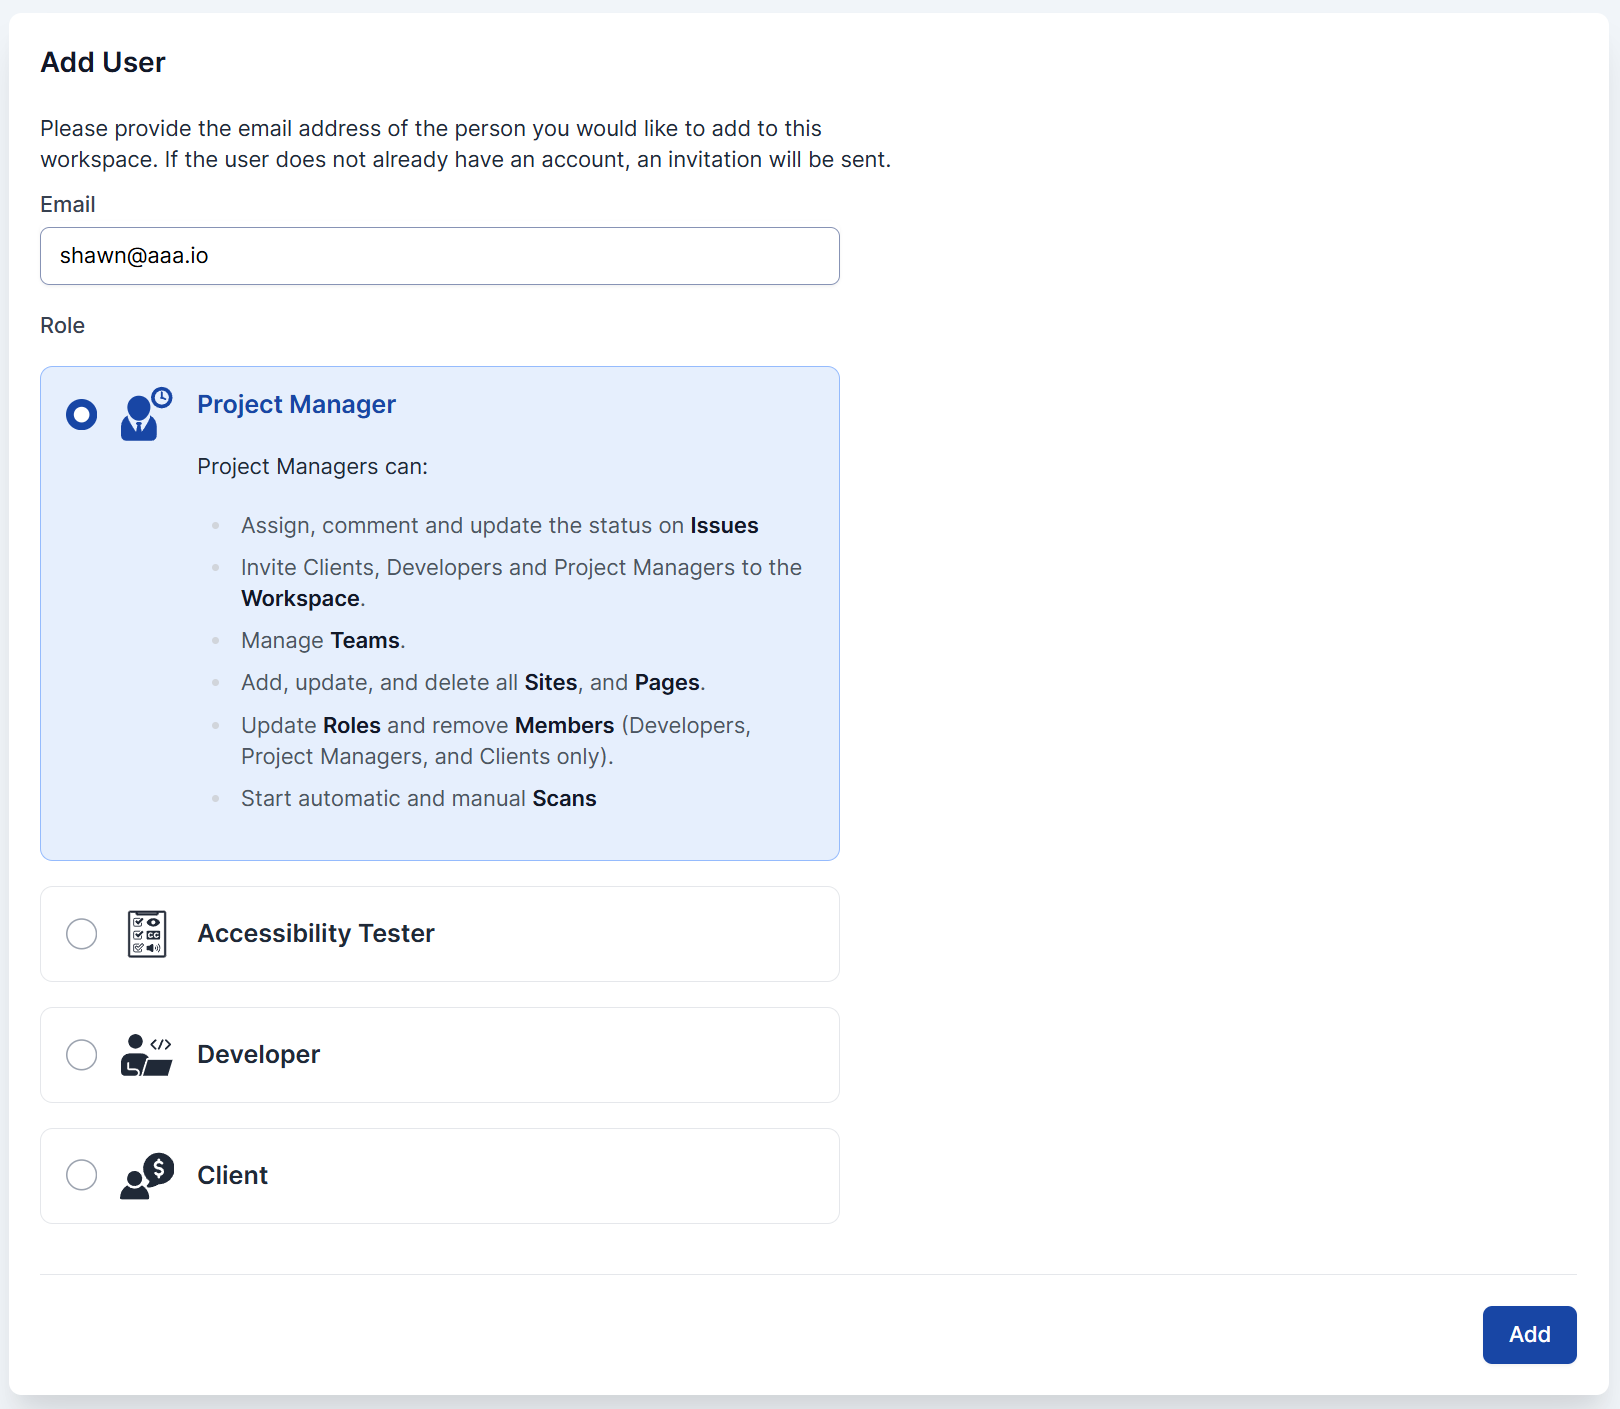
1. Invite Your Team
Go to Manage Workspace > Team, then invite users by entering their email addresses. You’ll assign each person a role as you add them:
- Accessibility Testers for users who will conduct manual audits
- Developers for users who will fix reported issues
- Clients for others who will coordinate alongside you
- Project Managers for people who need to monitor progress
New users receive an email invitation. Once they join, add them to a Team so they can access the right Sites.
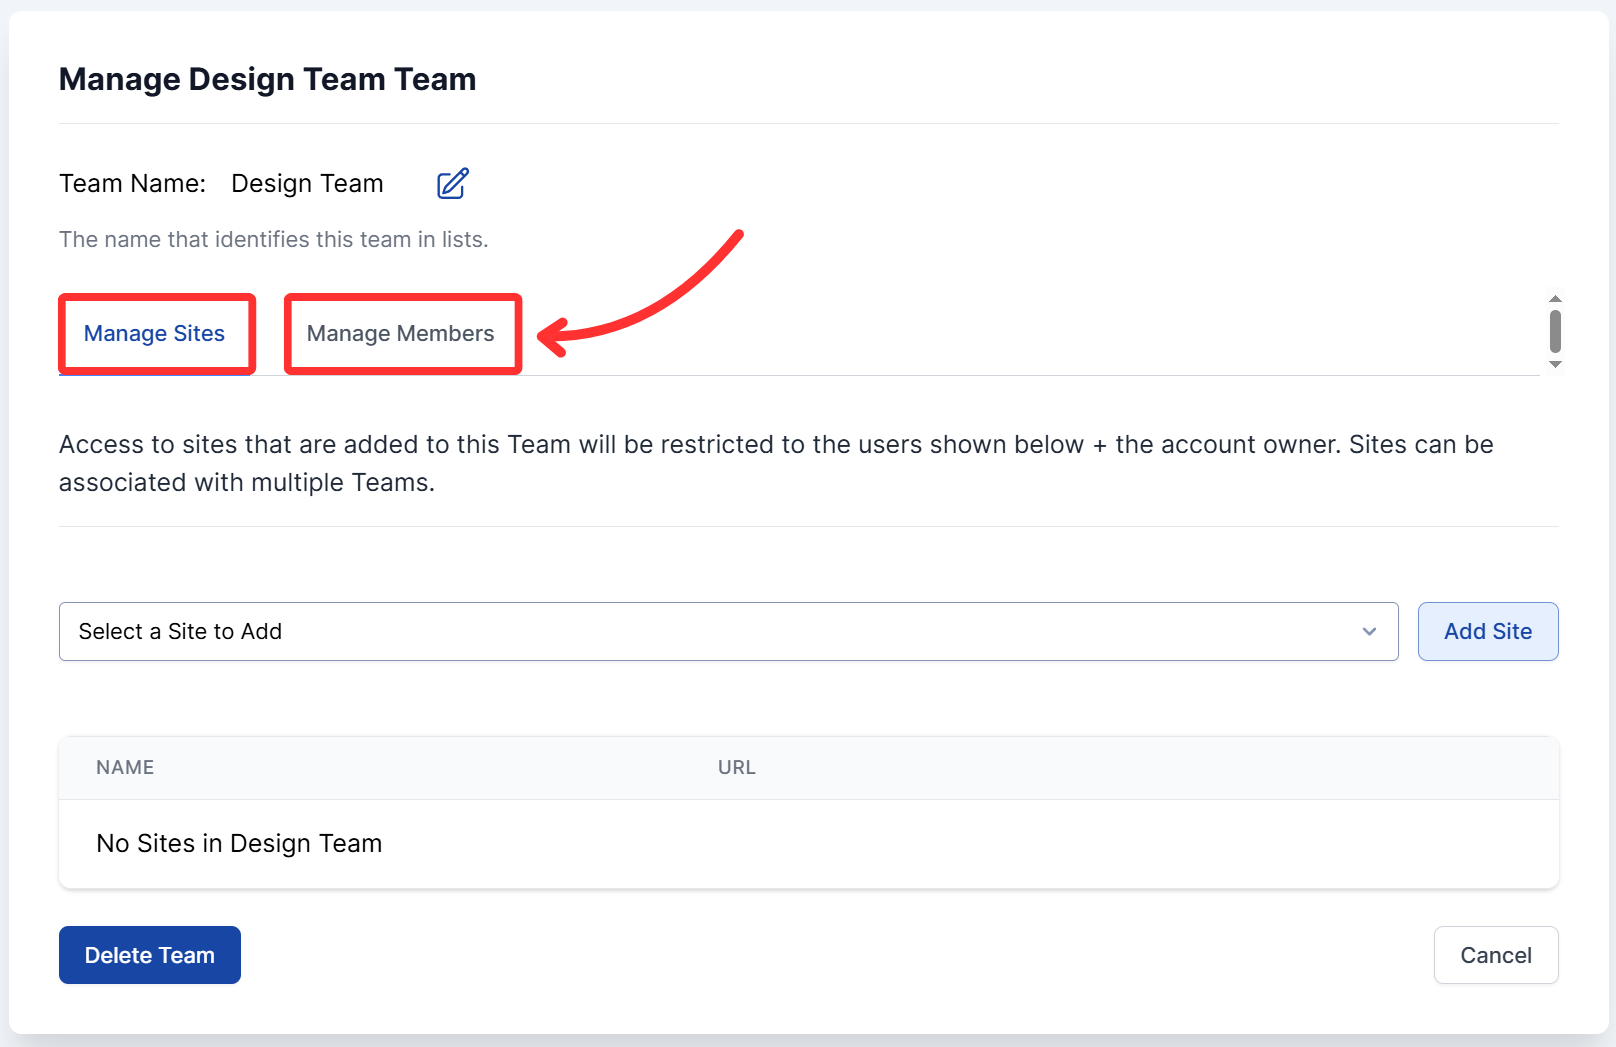
2. Create a Team and Assign Sites
Teams control which users can see which Sites. You can set up multiple Teams – useful if you’re managing several clients or departments under one Workspace.
- From the Teams page, click Add a Team.
- Give the team a descriptive name (for example, “Design Team”).
- Click Save.
- Open the team and add the relevant Sites and Members.
3. Add Sites and Pages
To add a new site for your team to audit:
- Go to Sites and click Add a New Site.
- After the site is added, open its Pages tab and add pages via sitemap or manually.
Once pages are added, AAArdvark will prompt you to run a scan.
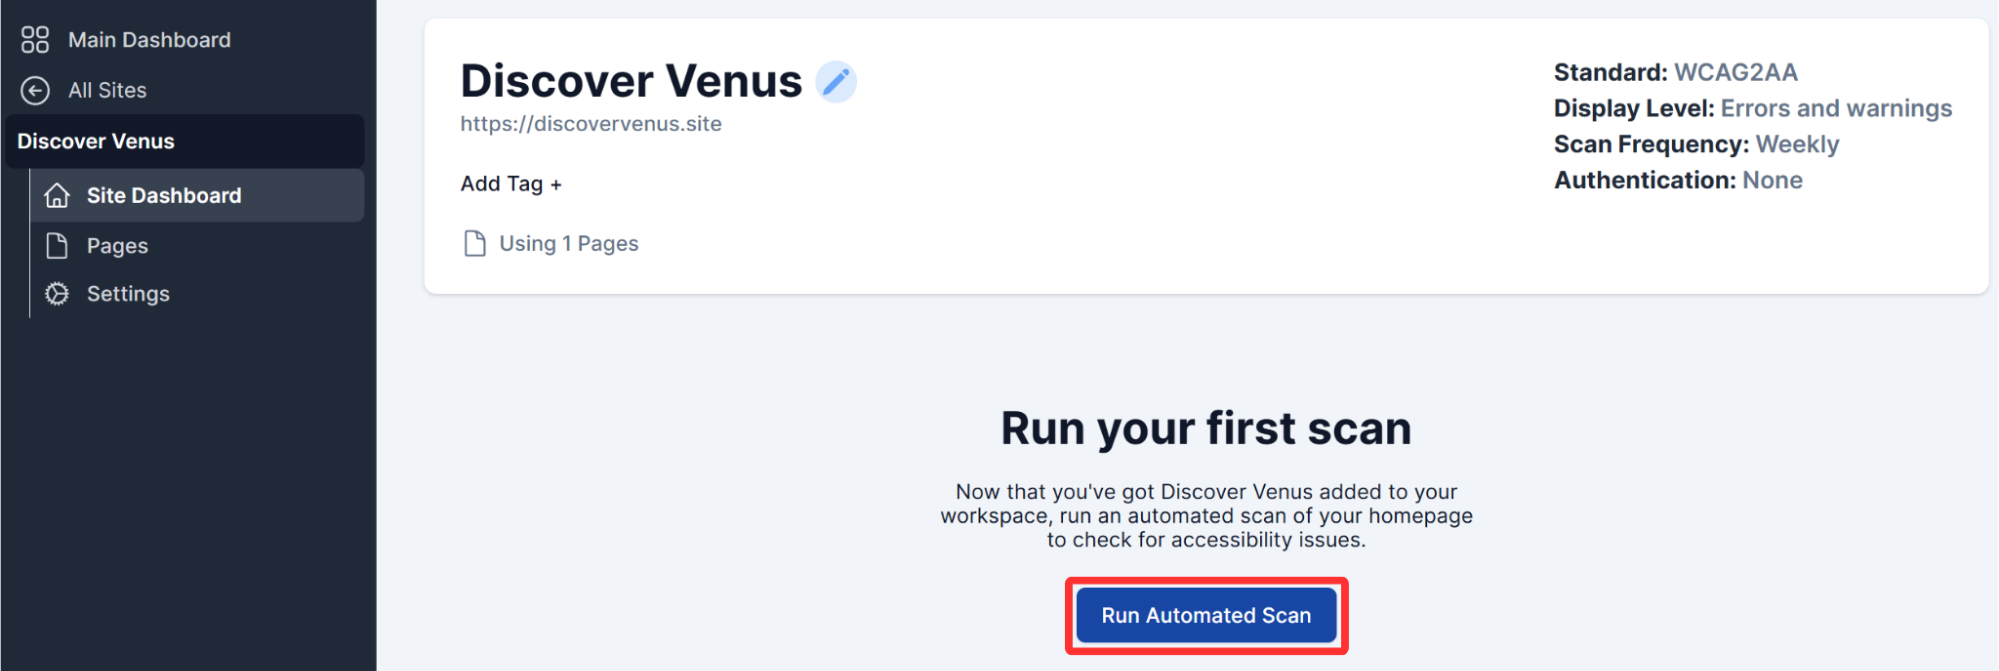
4. Run an Initial Scan
An initial automated scan gives the team a starting list of issues to work from.
From the Site Dashboard, click Run Automated Scan to scan the full site. You can also scan individual pages from the Pages tab.
For ongoing monitoring, schedule automated scans to run regularly. See the Automated Scans guide.
Auditing Your Sites
Automated scans catch a lot, but they don’t catch everything. AAArdvark supports both automated scanning and manual accessibility testing – and as a Project Manager, you can do either or both.
Automated Scans
Automated scans run from the Site Dashboard or the Pages tab. You can run them on demand or schedule them to run regularly. See the Automated Scans guide for setup and scheduling.
Manual Testing
Manual testing covers the issues that automated scans can’t find – things like keyboard navigation, screen reader behavior, and content clarity. Project Managers can join Accessibility Testers in the testing view to record findings.
Assigning and Tracking Issues
Once issues are in AAArdvark – whether from automated scans or manual testing – your job is to keep remediation moving.
Assigning Issues
Open any issue from the Issues list and use the Assign This Issue button to assign it to a team member. You can also assign issues directly from the Issues list view.
Tracking Status
Each issue moves through one of these statuses:
- Active – the issue has been found and isn’t fixed yet
- Pending Scan – an automated scan found the issue, and a developer has marked it fixed; AAArdvark will confirm the fix on the next automated scan
- Pending Review – a manual tester found the issue, and a developer has marked it fixed; the original tester will review and confirm the fix
- Resolved – the fix has been confirmed
- Dismissed – the issue is a false positive or otherwise not actionable
You can update the status of any issue and leave comments to coordinate with the team.
Use filters in the Issues list to see what’s outstanding:
- Filter by Status to see what’s still active
- Filter by Assigned to check workload by team member
- Filter by Type to separate automated from manual issues
See the Fix and Manage Issues guide for the full issue workflow.
Logging Manual Issues
To log a manual issue, open the site in Visual Mode from the Site Dashboard.
Visual Mode requires the AAArdvark browser extension. Install it for Chrome, Edge, or Firefox before getting started.
In Visual Mode, click on the element you want to flag – a panel opens where you can select the failure type from a dropdown.
- Select a predefined failure when the failure matches one in the library. The form auto-fills with the success criteria, severity, description, who’s affected, and how to fix it.
- Select Custom Failure when the failure isn’t in the library. You’ll fill in everything yourself: title, description, WCAG success criteria, severity, who’s affected, and how to fix.
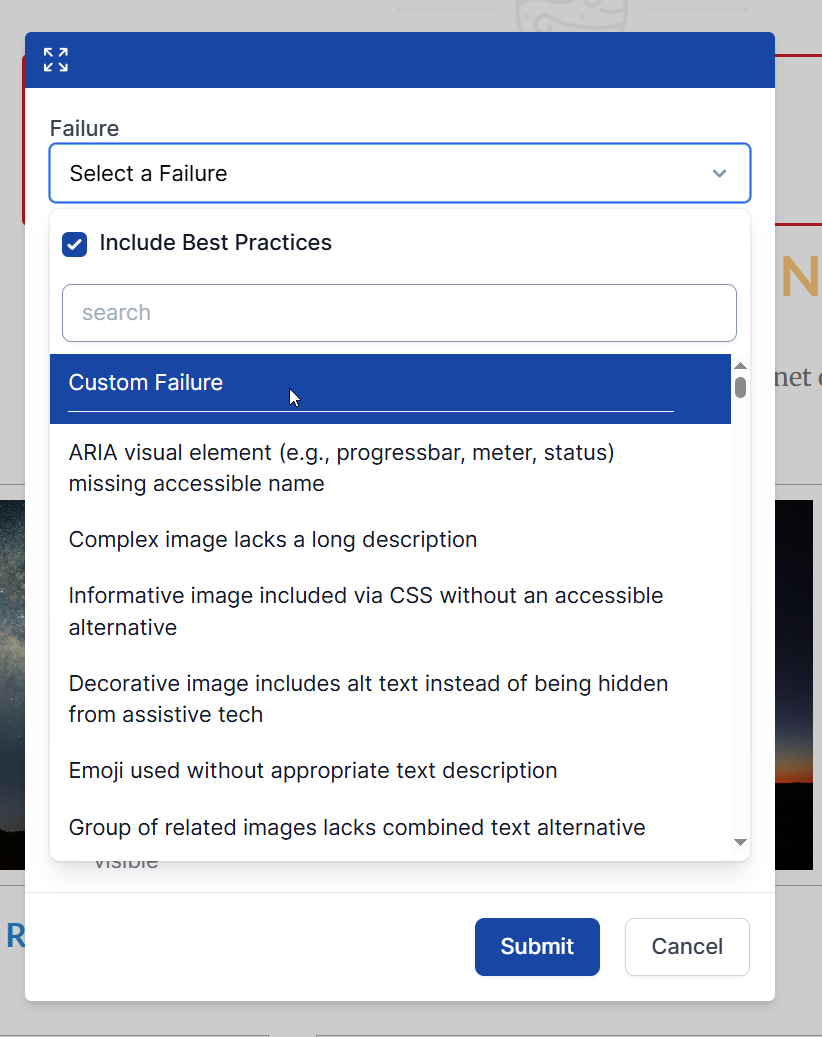
Once submitted, the issue appears in the Issues list alongside automated issues. Custom Manual Issues can be edited or deleted at any time.
See the Manual Testing Workflow and Custom Manual Issues guides for more details.
Site Tags help you organize Sites across the Workspace. Use them to filter and group Sites by client, region, project phase, or any category that fits your workflow.
To create, rename, or delete tags, go to Manage Workspace > Site Tags. To apply a tag, open a Site’s settings and select the relevant tags from the list.
Managing Integrations
Integrations connect AAArdvark to your existing workflow through webhooks and our API. You can use webhooks to push issue updates to other tools, or build custom workflows against the API.
Go to a Site’s settings and open the Integrations tab to configure them.
See the Webhooks guide for setup details.
Next Steps
Once the project is underway, the Accessibility Team Workflow guide gives you a full picture of how automated testing, manual testing, remediation, and ongoing monitoring fit together as a team.